 |
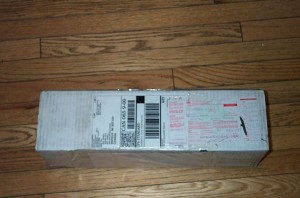
They come in
a box...a small unobtrusive, unassuming box.
But you know what they say
about great things coming in small packages... |
| |
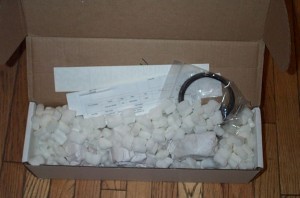 |
Inside you get the paperwork,
a couple of stickers, the installation hardware kit, and the drive flanges
and caps themselves all neatly packed in styrofoam peanuts....
...which is pretty funny when
you empty the box and realize the flanges themselves are 2 indestructible
chunks of heat treated alloy steel :-) |
| |
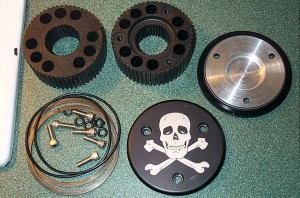 |
This is the complete kit
contents. You get:
- 2 drive flanges
- 2 custom drive caps
- 2 large O-rings
- 2 large snap rings
- 6 stainless steel socket
head cap screws
- 6 little O-rings
|
| |
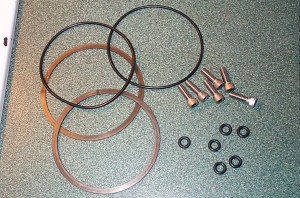 |
The completeness and attention
to detail are very nice.
The large snap rings are the
more modern style that wind round several times and can be installed and
removed with only a small screwdriver - personally I much prefer these
to the style that require snap-ring pliers for installation / removal.
The little O-rings ensure a
complete seal around the cap retaining screws - nice touch! |
| |
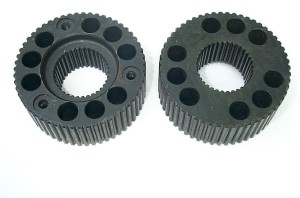 |
The drive flanges are manufactured
from 4140 Chrom-Moly Alloy Steel and are heat treated throughout for maximum
toughness, strength, and durability. |
| |
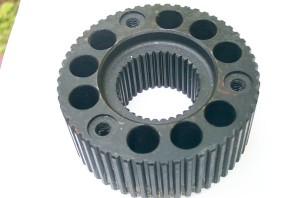 |
They are drilled to reduce
weight and the drive flanges themselves offer an unconditional, unlimited
lifetime warranty. In fact, Dave at Poly Performance said "If you
ever break one of these, you can smack my a$$ and call me Sally",
but I know what he meant was "If you break it, we replace it free" |
| |
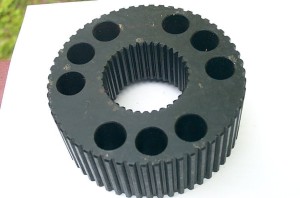 |
They also feature a black
oxide coating treatment to eliminate/reduce corrosion.
In my harsh climate it's certainly
more reduce than eliminate - they were left outside in the shop, untreated
for several weeks in the humid, salty Atlantic air, and suffered very
little corrosion, as the pics demonstrate |
| |
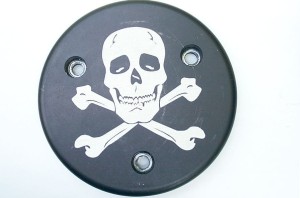 |
They come with a low-profile
hard anodized top cap with groovy laser etched "skull & cross
bones" logo.
I'm not one to succumb to form
OVER function - but I do enjoy something that has all the function - AND
looks cool. |
| |
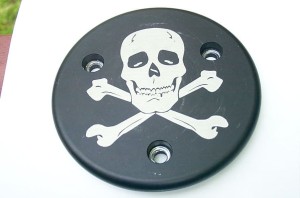 |
Custom engraving is available
on the caps for an additional charge. In order to have it done you need
to have the image you want engraved in vector eps format. Custom colours
are available too! |
| |
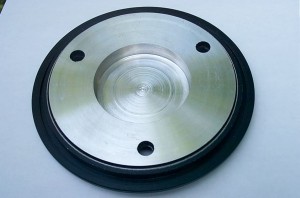 |
Backside of the cap. |
| |
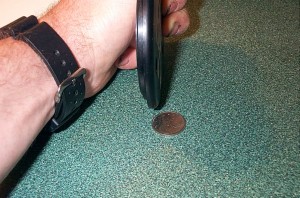 |
Cap next to quarter for scale.
It is the lowest profile cap available on the market, sticking out from
the hub less than any other flange cap or lockout - keeping things protected
from the rocks. |
| |
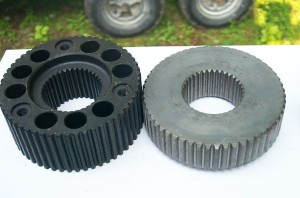 |
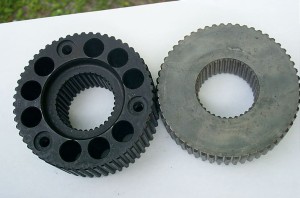
Here are the Poly Drive Flanges
next to the Warn 35 spline units . In comparison the Poly units are lighter... |
| |
 |
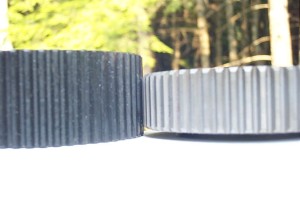
...stronger (better
material and heat treat)... |
| |
 |
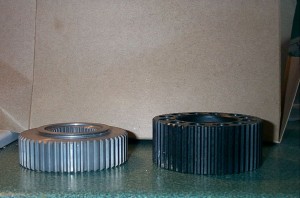
...feature a lot more spline
engagement... |
| |
 |
...fewer parts (Warn has an
extra piece to which the cap screws)... |
| |
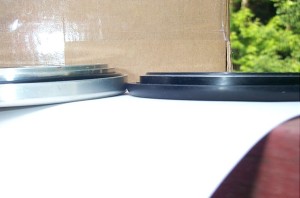 |
lower profile cap (better protected
from rocks and obstacles). |
| |
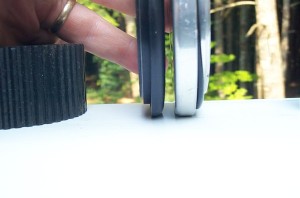 |
I measured a bunch of "hub
stickouts" and here are the results:
- Warn Premium 30 sp lockout
>1"
- 78 Ford OEM Spicer lockout
(1/4 turn) .835"
- Superwinch 30 spline lockout
(the narrowest lockout I've seen) .758"
- Warn 35 spline drive flange
cap .345"
- Poly Performance Chro-mo
Drive Flange cap 0.252 "
|
| |
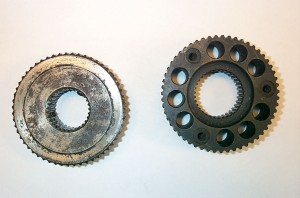 |
Poly Performance units next to the stock Spicer 30 Spline drive flanges. |
| |
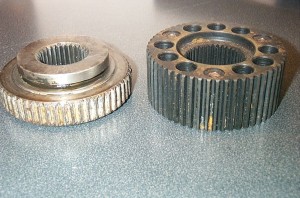 |
Pic speaks for itself. |
| |
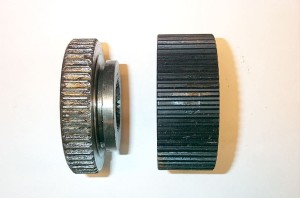 |
The Poly units have more than twice the spline
engagement between hub and flange! |
Installation
If you're doing a complete axle build
then of course you will be dealing with an axle already in a state of rebuild.
However, I'm going to detail the installation process from removal of old lockout
to installation completed for those that may simply be upgrading to the Poly
Performance flanges on a finished axle assembly. |
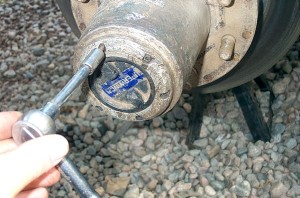 |
Start by removing the 6 small
bolts that hold the manual lockout cap on. They may be Allen head or Torx
bits, depending on brand / age. |
| |
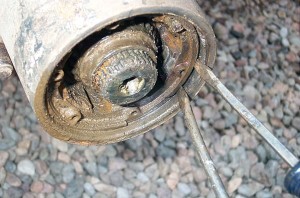 |
Once you have the cap off,
remove the 2 snap rings - one on the stub axle, and one just inside the
hub.
I find the "2 screwdriver"
method the best to lever out the big snap ring just inside the hub. Some
patience is required. The small snap ring in the end of the stub shaft
can be removed with a screwdriver, or with snap ring pliers if it is the
type with the holes for the pliers |
| |
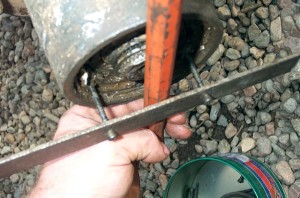 |
Once the snap rings are out,
you can remove the body of the manual lockout hub. If it is stubborn (as
most will be), you can easily fabricate a hub removal tool. I use a scrap
piece of 1" strap, drilled to take 2 of the hub cap screws, and a
big chisel behind it. To use it, just screw 2 screws back into the hub
through the tool, then put a bar or chisel behind it and yank out the
hub. |
| |
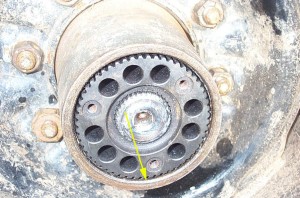 |
Push the drive
flange in so it engages the splines in the wheel hub and the big outside
lock-ring groove in the wheel hub is visible (yellow arrow). DO NOT hammer
it in, do not force it - the axle shaft or wheel hub may need to be rotated
slightly to allow alignment of the shaft and hub splines.
Install large supplied lock-ring
in groove in wheel hub to retain drive flange in hub body. Ensure that
it is fully seated. |
| |
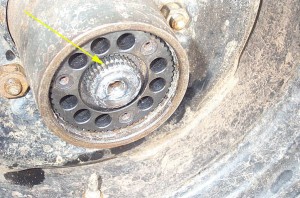 |
Gently seat the drive flange
far enough into the hub body so that the stub axle snap ring can be installed
in the groove (yellow arrow) in the end of the stub shafts splines. |
| |
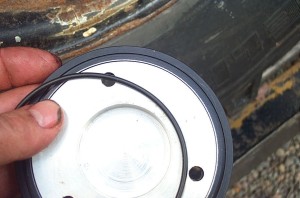 |
Slip large supplied O-rings
over the edge of the cap... |
| |
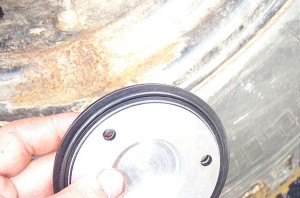 |
...till it seats like this.
Lightly lubricate the O-ring
seal with wheel bearing grease. |
| |
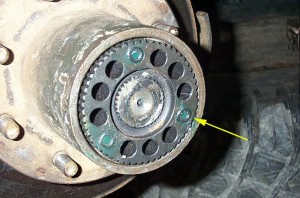 |
Place a dab of grease in the
recess surrounding each cap screw threaded hole (yellow arrow) and place
one of the small O-rings in each recess. |
| |
 |
Insert Drive Flange Cap into
the wheel hub and align holes in cap with threaded holes in drive flange.
Apply a small amount of Loctite
blue (medium strength) thread locking compound onto each cap screw, then
insert stainless steel screws and tighten to 25-30 Inch-lbs. |
| |
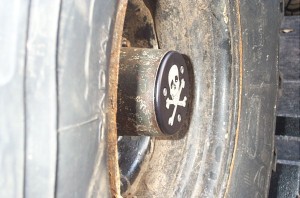 |
I very much like the simple
clean design of the Poly flanges with the cap attaching directly to the
drive flange.
Just look at how impossibly
small the stickout is - VERY cool! |
| |
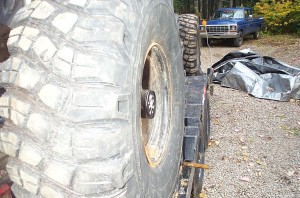 |
This design is certainly
cleaner and much less stickout than the stock Spicer press-on cap style,
and a MUCH better seal as well.
I also like the fewer parts
than the Warn "cap-attaches-to-seperate-disc" style. |
| |
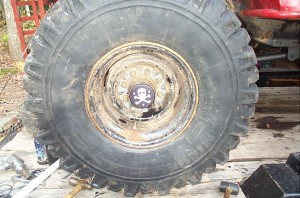 |
There is however, one possible
drawback to the Poly design. Should you have to remove the drive flange
for any reason (e.g. less than full size spare on front end while on a
trail tough enough to still require as many wheels driving as possible)
it is a very quick and easy operation - but there will be no way to reinstall
the cap without the flange installed.
It's not a huge deal, an old
press-in cap could be used, a simple plastic cap fabricated or even a
rag stuffed in there - but it's something to consider.
Maybe we can get Poly Performance
to turn out some trick new "press-in" temporary caps for just
this purpose? |
| |
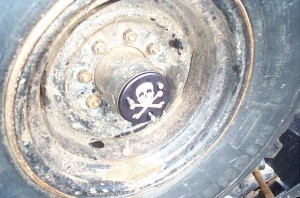 |
That said - I love my Poly
Performance drive flanges - they're unbreakable, elegantly designed, AND
stylish - what more can you ask?
Combined with Poly Performance's
aggressive pricing and Superb customer service - there is simply NO competition
- these li'l beauties stand alone at the top of the options for drive
options - and that's why they have pride of place in the BillaVista-60.
I HIGHLY recommend you get
your own set too! |

