 |
Crow Driver Restraint Systems
By Bill "BillaVista" Ansell |
IntroductionDeceptively simple in appearance, there are many nuances to a properly selected, installed, and adjusted driver restraint system; or as it is more commonly known: "five-point harness". There are also quite a few misnomers and some misinformation floating around out there, starting with the term "five-point harness"! In this article I aim to present some tech on driver restraints and review some different systems available from Crow Enterprizes. |
 |
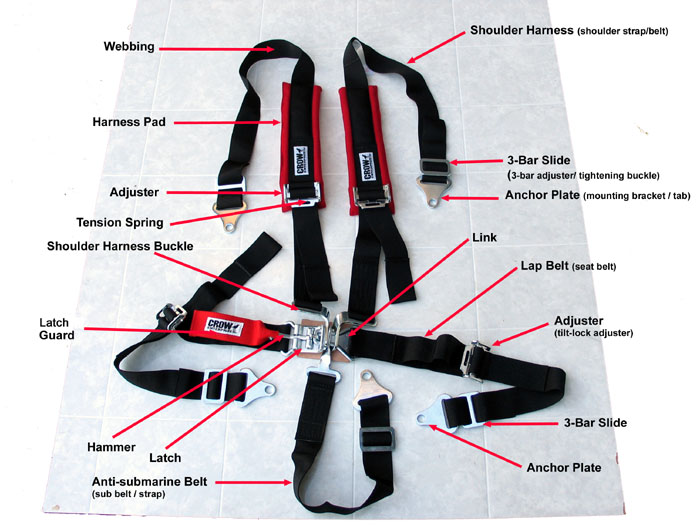
Table of ContentsWhat is a driver restraint system?A driver restraint system is a system of belts (normally constructed from nylon), buckles, adjusters, and accessories which, when combined with proper mounting points and hardware, serves to restrain a driver (or passenger) in a vehicle during a collision. Modern designs originate from the racing world, which is why they are called "driver" restraint systems as there are normally no passengers in most forms of racing. Although "driver restraint system" is the usual terminology, they could also be thought of, and called, "occupant restraint systems" as they function the same for driver or passenger. As mentioned, the common name for such a system is a "five-point harness", although this name is often a misnomer for reasons we shall explore shortly. There are many different styles and options available to suit almost any driver or car, many of which we shall explore in some detail later in this article. However, they all work in basically the same manner, and most share a large percentage of parts. As such, let's begin by looking at the parts and their names so that from this point forward we can be 100% certain of what we are talking about. NomenclatureThe following picture illustrates the main components of a driver restraint system. Where there is more than one common name for a part, I have included alternatives in brackets. Note that, technically, the "harness" refers to the shoulder straps and that the complete set of restraints - i.e. the shoulder harness, the lap belt, and the anti-submarine belt combine to create the entire restraint "system". That said, "driver restraint system" is something of an unwieldy term, and therefore many people refer to the entire system as a 'harness". Given that I am about to use the term "driver restraint system" perhaps more consecutive times than anyone in history, I shall bow to this conventional usage and use the term "harness" interchangeably with "driver restrain system." When I wish to refer specifically to the upper portion I shall use the term "shoulder harness", "shoulder strap", or "shoulder belt". Note also that the lowermost belt is properly called an "anti-submarine" belt after its function, which is to prevent "submarining" (wherein the driver, thrown forward, slides under the lap belt and out of the harness or "submarines"). Again, for reasons of brevity, common usage has this belt often referred to as the sub belt (much the same way an anti-roll bar becomes a roll-bar). In summary then, a driver restraint system consists of multiple belts and buckles, usually shoulder belts, a lap belt, and an anti-sub belt. How does it work?In a collision, a driver tends to be thrown forwards and upwards. Unrestrained, said driver would impact objects inside the car with tremendous force, resulting in grievous injury. Alternatively a driver may be thrown from a vehicle and similarly injured. The goal of a restraint system then is simple - to restrain the driver in his seat, inside the roll cage, during a collision or accident with the intent of minimizing injury. ** NOTE: in order to function properly, any driver restraint must be matched to a properly constructed, fitted, and installed seat firmly mounted to the frame / chassis / roll-cage of the vehicle. The best restraint in the world will do you little good if your flimsy seat is torn from its rusty floor mounts in an accident, as the unrestrained seat will allow unwanted slack in the harness, preventing it from properly restraining you. ** The forces experienced by a driver during a collision can be extremely high. For example, during the controlled crash simulation specified by the "FIA Standard 8854/98 dynamic test"*, the force on the drivers pelvis can exceed 3,000 lbs on each side, and the load on each shoulder strap can surpass 1,550 lbs. The anti-sub strap can be loaded to more than 1,320 lb. * (upright seating position, 90° head-on collision, 165 lb driver, impact velocity 31 mph, stopping distance of approximately 16”, maximum deceleration of 30 g) Restraining the human body during such an event is obviously a challenge. The only way to do it with any amount of safety is by routing the straps in such a way that they act on the hard points of the body. This is a critical concept. For a seated driving position, the ONLY hard points capable of sustaining these kinds of forces without immediate grievous injury are the pelvic bone, the clavicles (shoulder blades), and to a lesser extent the sternum (breast bone.) Everything we discuss from this point forward comes back to this critical concept. Harness selection, proper installation, proper adjustment, and proper maintenance all relate back to this - the human body can only be safely restrained via these hard points. To emphasize, consider the example of an improperly positioned / adjusted lap belt that rides high on the body around the abdomen as opposed to in the crest between the pelvic bone and upper thigh. When the lap belt is around the abdomen a force as little as 800 lbs can cause severe internal injury. In contrast, the pelvic bone can withstand several thousand pounds of force. Bottom line - for any restraint system to be effective, it MUST restrain the occupant via the body's hardpoints. Let's have a graphical look at this most important concept. |
|
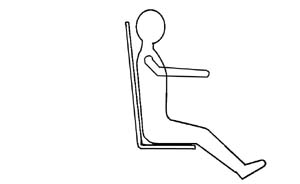 |
Here we have our poor, crash-prone driver sitting happily in his seat. Let's call him Larry. |
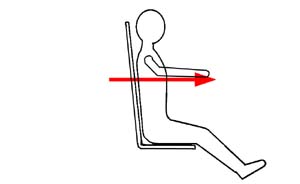 |
When poor Larry's car meets an immovable object at speed, inertia will cause Larry to be thrown forward, as indicated by the red arrow. |
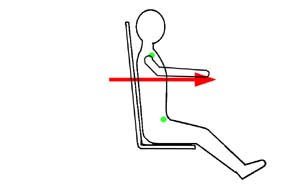 |
In order to prevent Larry from being thrown into the steering wheel and injured, or worse, ejected from the vehicle (God forbid!), he needs to be restrained by the hardpoints in his body that are capable of sustaining the forces involved without causing poor Larry immediate grievous injury. These hardpoints are his pelvic bone and clavicles, as indicated by the green dots. |
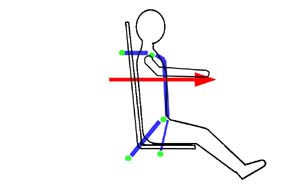 |
We then connect Larry's hardpoints to appropriate hardpoints in the chassis using a properly installed and fitted driver restraint system (harness). Here we can see the shoulder belt, lap belt, and anti-sub belt connected to the car's chassis / cage hardpoints (identified by green dots). In this manner, Larry stands the greatest chance of being restrained during a crash and hopefully avoiding serious injury. |
We will return to Larry and his restraint system in Part 2 when we discuss harness mounting. How each part functionsIn order for the driver restraint system to function as a whole and keep the driver inside the roll cage where the least amount of injury will occur during a crash, each individual part must do its job. The shoulder harness is intended to restrain movement of the upper torso. It does this by holding the driver back in his seat. The shoulder harness is NOT designed to hold the driver down in the seat. An optional sternum strap can be used to connect the shoulder straps together and prevent the driver from slipping out of the shoulder harness. The lap belt is intended to restrain movement of the pelvis and lower torso. It holds the driver back and down in the seat. It must be located and properly tightened so that it rests in the pelvic crest between the pelvic bone and upper thigh. It is also the lap belt that holds the driver down in the seat in a low-speed roll-over - not the shoulder harness. In order to be most effective, the lap belt must be used with an anti-submarine belt to keep it in the proper position. The anti-submarine belt prevents the driver from slipping forward and under the lap belt during a crash. It also holds the harness buckle in place over the pelvic area and keeps the lap belt in the proper location over the pelvic bone. Because the pelvic bone can withstand many more times the force than the abdomen, it is critical that the lap belt be maintained in the proper position. The main buckle or latching assembly in a driver restraint connects all the individual belts together providing for quick, easy, and reliable securing of the restraint system as well as providing a quick and simple mechanism for the driver to release the restraints and egress the vehicle in a hurry in the event of fire or some other emergency. Tilt-lock adjusters on the shoulder belts and lap belts provide a method for the driver to quickly and easily tighten and loosen the straps of the harness. They also provide a small measure of adjustment to the lengths of the belts which can accommodate different drivers or different clothing. However, if a large adjustment in length is required, this will have to be made at the mounting points or 3-bar slides (if equipped) as the range of adjustment at the tilt-locks is relatively small, especially in the shoulder straps if the harness is to remain positioned properly on the body. In other words, if the restraint is properly installed and adjusted for a 5'4" 140 lb driver, it is very unlikely that it could be properly adjusted for a 6'4" 250 lb driver using only the tilt-lock adjusters. Gross adjustments in the length of the individual belts can be made with a combination of belt length, mounting point location in the vehicle relative to the seat, and the 3-bar slide if so equipped. Finally, all the individual belts must be properly secured to appropriate chassis hard points using proper hardware and methods. We will cover this topic in great detail in Part 2. The Different Driver Restraint SystemsWays vs. PointsAs previously mentioned, in common usage most people refer to almost any style of driver restraint as a "five point harness." Normally, when people refer to a “4-point”, “5-point”, or “6-point” harness, they are referring to the number of straps or belts. Technically, however, “point” refers to the attachment point between the harness and the vehicle, and the term “way” refers to the belts. Depending on the style of the shoulder harness, you can have more ways than points. Specifically, in the case of a Y- or V-style harness, there are two shoulder belts, but only a single, shared mounting point for them. Obviously you can’t have more points than ways. Because of this, in order to avoid any confusion, it is best to refer to a harness in terms of its number of ways and points. So, if a way is a belt, and a point ia an attachment location, we can then describe any harness accurately by saying it is an "x-way, y-point" harness. For example, a tradition dual shoulder strap system with an anti-sub belt would be a 5-way, 5-point harness. If we deleted the anti-sub belt we would have a 4-way, 4 point harness, and if we switched to a V or Y style shoulder harness we would have a 4-way, 3-point harness. A few pictures should clarify the concept: |
|
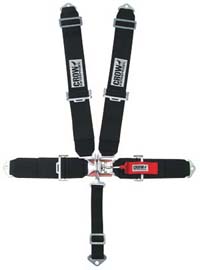 |
5-way, 5-point harness. |
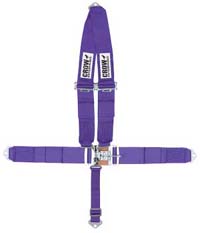 |
5-way, 4-point harness. |
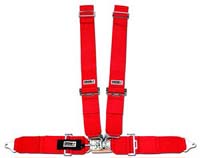 |
4-way, 4-point harness. |
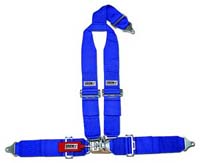 |
4-way, 3-point harness. |
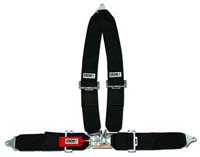 |
4-way, 3-point harness. |
Styles – H, Y, & VFrom the above pictures you will have no-doubt noticed that there are three separate styles of shoulder belts. These are the so-called "H", "V", and "Y" style. All are 2-way shoulder belts (after all, it would make no sense to have a single shoulder strap) but the number of attachment points differs. H-style harnesses have an individual belt for each shoulder, and each belt has its own attachment point. Both Y and V style have individual belts for each shoulder that share a single attachment point behind the seat. Regardless of the style, each shoulder strap does exactly the same job - restrains the driver via his shoulder-blade hardpoints. There are some advantages and disadvantages to each style as discussed below. To describe any harness then, we would need to specify its ways, points, and shoulder harness style, as in: |
|
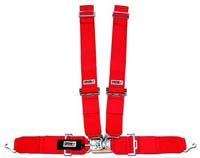 |
4-way, 4-point, H-style harness. |
 |
5-way, 5-point, H-style harness. The H style is the most common, most flexible system. However, you do need a seat with dual slots cut in the seat back. You also need two attachment points behind the seat, one for each individual belt (this can be a challenge in cramped cockpits). Properly mounted, the H style virtually eliminates any chance of the shoulder belts rubbing on the neck. The shoulder belts are individually adjustable for length, and come in wrap-around, bolt-in, or snap-in attachment styles (more on these later.) |
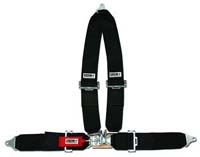 |
4-way, 3-point, V-style. |
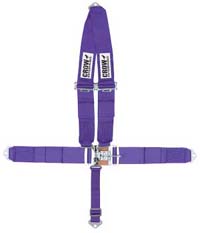 |
5-way, 4-point, V style. Common in the cramped, weight-conscious cockpits of drag cars, the V-style eliminates one of the shoulder belt mounting points required. You do still need a seat with dual slots though as forcing both straps through a single slot would most probably leave the shoulder straps improperly located on the shoulders (remember the hard points!) and almost certainly produce awful neck rub. Tthis style of shoulder harness must be fed through from the back of the seat. V-style are only available in bolt-in or snap-in mounts - obviously wrap-around would not work. Note also that there is no length adjustment available between the shoulder harness anchor plate and the tilt-lock adjusters. Given the limited adjustment of the tilt-lock adjusters (and the fact that they should ride on the body in a specific location) this means that you need to match the shoulder belt length to the particular seat, driver, and chassis mounting point and get it right the first time! If the shoulder harness mounting point is too close or too far away, you need to move it or buy a new shoulder belt - there is no adjustment available. |
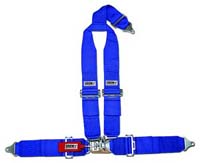 |
4-way, 4-point, Y-style harness. The Y-style harness is something of a compromise between the H and the V. Like the H, the shoulder belt attachment is available in wrap-around, bolt-in, or snap-in; and there is provision for length adjustment of the shoulder harness. Like the V style there is only one shoulder strap attachment point required. The Y also has some unique properties. You can use it with a seat with a single slot or dual sots in the seat back (although if used with a dual-slot seat, you may have difficulty in positioning the shoulder harness tilt-lock adjusters properly on the body). Y-style shoulder harnesses are also not SFI rated and can not be so rated. More on SFI ratings later, but keep that in mind if SFI ratings are important to you. |
When it's all said and done, the choice of which style to use - H, V or Y - is going to be a matter of personal preference and what fits well in the car. Each style is capable of restraining the driver, although keep in mind that the Y style isn't SFI rated and probably isn't accepted by most competition sanctioning bodies - it's really more of a recreational restraint than a full-on competition restraint. Also keep in mind that with a Y-style harness the load on both shoulder straps in a crash (up tp 1500 lbs + each or > 3000 lbs total) will ultimately be applied to the single harness mounting strap and in a bolt-in application thence to the single mounting bracket / bolt. My personal preference is the H style, and if you have the room or are designing the chassis mounting points around the harness I think most people would be best served with the H style. Attachment MethodsWith some exceptions, most belts are available in one of three attachment styles: wrap-around, bolt-in, or snap-in (also sometimes called floor-mount or quick-release). Each has its advantages and disadvantages - here's a look: |
|
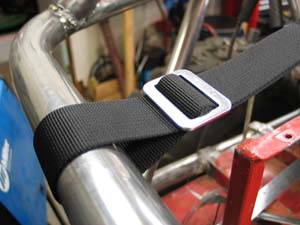 |
A wrap-around attachment does just that. It is designed to wrap around a tube. The belt is then adjusted for length and secured with a 3-bar slide. The advantage to this is that there are no additional tabs, nuts or bolts required and it provides a good strong attachment. That said, wrap-around belts work best when the bar is horizontal, and even then some sort of "stops' are required to prevent the belt from sliding sideways on the bar (more on this later in the "mounting' section in Part 2). Wrap-around attachments are common on shoulder straps but are seldom seen in lap or anti-sub belts. Notice that there are no stops either side of this belt. There are also two other errors - by the end of Part 2 I hope you will be able to quickly spot them. |
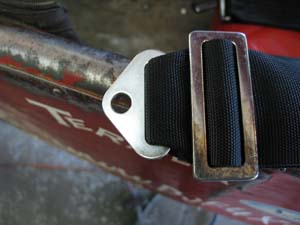 |
Bolt-in attachments use a bracket or tab known as an "anchor plate" through which the belt is fed. The anchor plate is then bolted to a mounting bracket or tab in the vehicle. There are two sub-types of bolt-in attachments. The first uses a three-bar slide in much the same way as a wrap-around belt. In fact they work the same way as a wrap-around belt except that the belt "warps around" the anchor plate instead of a bar and the anchor plate is then bolted into the vehicle. Bolt-in with 3-bar slide is my favourite style of attachment as it can quickly and easily be converted between wrap-around and bolt-in - particularly useful if you are still finalizing the chassis design. The three-bar slide also provides length adjustment of the strap, just like in a wrap-around attachment. |
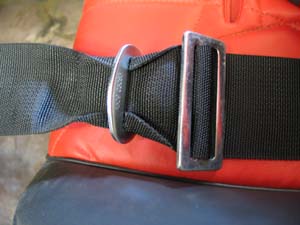 |
Note that the internal "slot" in all anchor plates is 2" wide. When used with a 3' wide belt, the edges of the belts are folded over where they pass through the anchor plate, as shown here. |
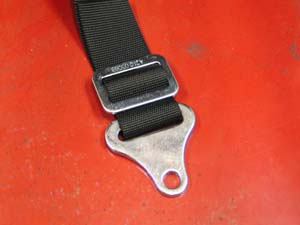 |
With 2" webbing, the belt simply fits through the slot. |
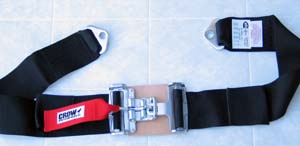 |
The other sub-type of bolt-in attachment is the bolt-in with sewn-in anchor plates. In some belts it is either not possible or not desirable to have length adjustment and a 3-bar slide in the belt. When such belts use bolt-in attachments, the anchor plates are sewn into the belt, as shown in this picture of a "duck-bill" lap belt. (More on duck-bill belts later.) |
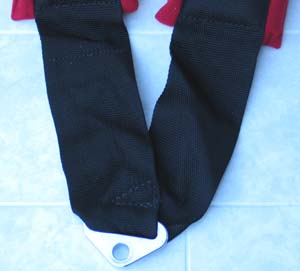 |
This picture of a V-style shoulder harness also shows a sewn-in anchor plate. Although there is no length adjustment available with sewn-in bolt-in anchor plates, they do provide for the cleanest installation and remove any chance of the user / installer making an error when feeding the belt through the 3-bar slide. |
 |
The final type of attachment style is known as snap-in, quick-release, or floor-mount. It is similar to the bolt-in style, except that the anchor plate is replaced by a snap-in buckle. Similar to the bolt-in style, the snap-in buckle may be sewn into the belt or threaded on with a 3-bar slide. |
 |
The snap-in buckle is then connected to the vehicle chassis via an eyebolt. Not shown in this is the tiny cotter pin that MUST be inserted through the hole in the buckle's gate, shown at far left. |
 |
This attachment style is sometimes known as "floor-mount" as the eyebolt and accompanying large fender washer are used to mount the belt to the floor of a vehicle when rules or sanctioning bodies demand it (it's a car thing!) They have their place, but I am not a fan of the snap-in mounts for the following reasons:
|
Once again, the final choice of attachment style is likely to be a matter of personal preference and what fits the car or buggy in question. My personal preference and recommendation would be bolt-in, combined with the 3-bar slide where possible, so that you can adjust for length and/or convert easily to wrap-around attachment should that turn out to be a better option for your rig. 2” vs 3” & combinationsYet another decision that has to be made when purchasing a restraint system is whether to use 2" or 3" webbing for the belts - or even a combination! Body size and personal preference will play a large part in the decision. The best bet is to try both in different rigs if you can, as no matter how much I babble on here or how many pics I post, there's no substitute for hands-on experience. That said, there are a number of considerations to take into account.
Just to complicate matters somewhat – you can also mix ‘n’ match webbing sizes for the shoulder and lap belts (anti-sub belts are always 2”). When this is done, the lap belt size is most commonly called out first. In this way, a 3x2 harness would have a 3” lap belt and 2” shoulder belts. Thus we have: |
|
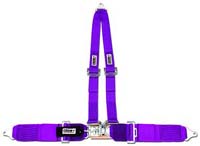 |
4-way, 3-point, V-style, 3x2 |
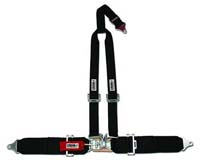 |
4-way, 3-point, Y-style, 3x2 |
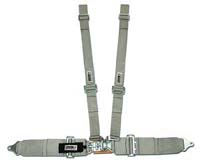 |
4-way, 4-point, H-style, 3x2 |
 |
5-way, 5-point, H-style, 3" If the lap and shoulder belts use the same size webbing, the harness will normally just be called a 2” or 3” harness, as opposed to 2x2 or 3x3. |
Lap belt tightening – pull down, pull-up, duck-billOK, so you've decided how many ways you want, how many points, the shoulder strap style, the attachment style, and the width of the webbing - only about seven more decisions to make before you're ready to order! The next decision is one of the hardest - which style lap belt to use? There are three different lap belt tightening styles - as usual each with their advantages and disadvantages. Standard Pull-down |
|
 |
The "standard" lap belt style is known as "pull down", so named for the direction one pulls on the belts to tighten them. Shown here is a 2" pull-down lap belt. |
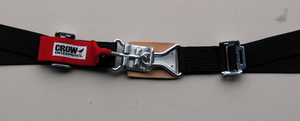 |
Closer view of the pull-down mechanism. |
 |
Notice that the tilt-lock adjuster is connected to the main buckle by a short length of webbing (normally 3.5"), and the adjustable portion of the belt (the part you pull on to tighten it) is connected to the vehicle. If you are seated in a cramped cockpit, this can reduce the distance you have to pull on the belt before you elbows or hands run out of room. |
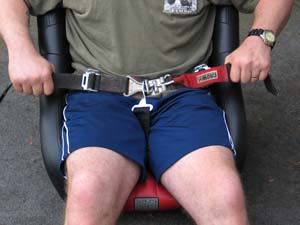 |
The situation can be made worse if you are using a seat with high side bolsters, as you are forced to pull up, or at best sideways, on a belt that is designed to be pulled down to be tightened. Here poor Larry is demonstrating the issue with both hands on the belts and ... |
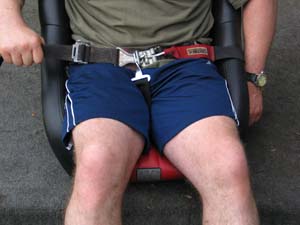 |
... with one hand on the belt. One advantage to pull-down style though, is that excess lap belt webbing points towards the seat slot and can be neatly tucked away out of the driver's lap. |
Pull-up |
|
 |
An alternative to the pull-down style of lap belt is the pull-up style. With a pull-up style belt the tilt-lock adjuster is attached to the vehicle with a length of webbing, and the adjustable portion of the belt (the part you pull on to tighten it) is connected to the main buckle. Shown is a bolt-in 2" pull-up belt. Note that with this particular belt, the anchor plate is attached with a 3-bar slide (as opposed to being sewn-in) which provides a measure of adjustability as to where the tilt-lock adjuster is positioned relative to the chassis anchor point and the seat. This is a very useful feature that we shall examine again.
|
 |
This arrangement is the opposite way round to the pull down belt, and means the user pulls upwards and towards the body's centreline to tighten the belts. |
 |
3" pull-up lap belt. Note that the anchor plate is sewn onto the belt so that there is no adjustability as to where the tilt-lock adjuster is positioned relative to the chassis anchor point and the seat. |
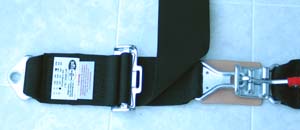 |
Close-up of the 3" pull-up tilt-lock adjuster and main buckle. |
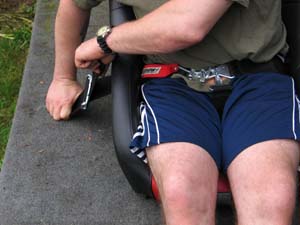 |
Here Larry is demonstrating the pull-up method of tightening. Note the ton of elbow room and the fact that the seat's high side bolsters are not hindering his efforts. Also, most people can generate more force pulling up than they can down, allowing them to get the belts tighter, or to get them tight enough with less effort. |
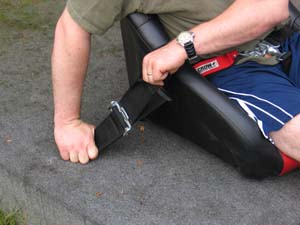 |
Another view of the pull-up tightening action. |
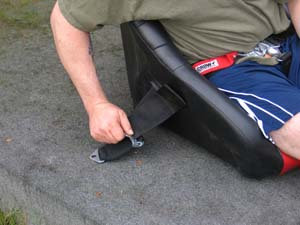 |
Here Larry is demonstrating the method of loosening the pull-up style tilt-lock adjuster - and it is here that we first glimpse the potential issue with the pull-up style belts. |
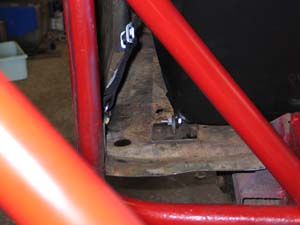 |
The tilt-lock adjuster on a pull-up lap belt is meant to be installed outside the seat, as shown here. |
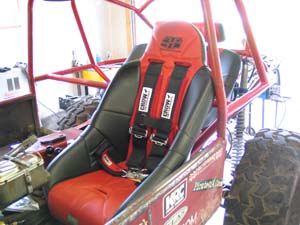 |
The issue is, with high side-bolster seats and a narrow bodied vehicle... |
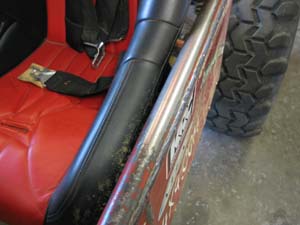 |
... there is very little room between the outside edge of the seat and the inside edge of the body. |
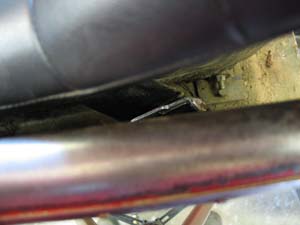 |
As you can see, this leaves precious little room for the driver to get his hand between the seat and the body to reach the tilt-lock adjuster. |
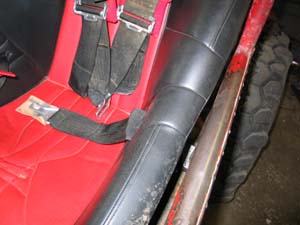 |
Depending on the location of the lap belt anchor point and therefore how far away from the seat the tilt-lock adjuster is positioned, it can also mean that a fairly long lap belt is required so that there is enough webbing to be fed through the seat slot and leave enough for the driver to grasp and pull on to tighten. Here we can see that this particular installation leaves just enough belt to poke through the seat slot. Of course, this will also depend on the size of the driver and how much of the belt is required to go around him or her. |
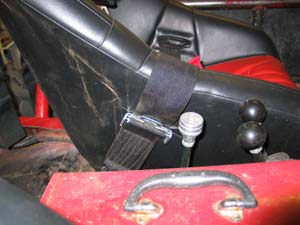 |
The pull-up style belt is less of an issue on the inside side of the seat as there is normally more room there to reach the tilt-lock adjuster. In this example the portion of the belt the driver grabs and pulls to tighten has been routed over the edge of the seat, instead of being fed through the slot. This makes the belt easier to grasp but, depending on the seat and the location of the anchor point, can result in an awkward angle at which to pull. |
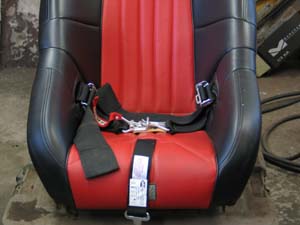 |
This issue of tilt-lock position with a pull-up belt can be alleviated by installing the lap belt so that the tilt-lock adjusters are positioned inside the seat, as shown here. In order to do so, the webbing must be long enough between the anchor plate and the tilt-lock adjuster. This is easy to arrange if the anchor plate is attached with a 3-bar slide, as in the 2" pull-up belt shown above. It can be more of a challenge if the anchor plate is sewn into the belt, as in the the 3" pull-up belt shown above. I have seen folks build long mounting brackets to position the tilt-lock adjuster inside the seat with a pull-up belt. If this is planned, great caution must be taken so that the mount is strong enough to resist any bending forces in a crash, and that the arrangement does not violate any of the installation rules we will discuss in Part 2. |
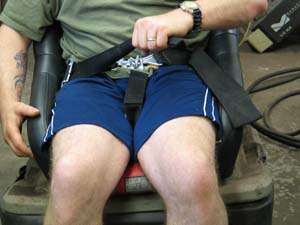 |
That said, placing a pull-up belt's tilt-lock adjusters inside the seat does make for easy and convenient tightening and loosening of the belt, whether with one hand... |
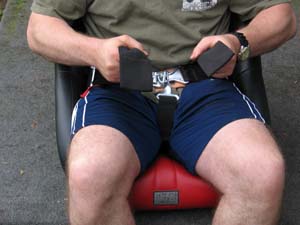 |
...or with two. There are just three issues with this approach:
|
Duck-bill |
|
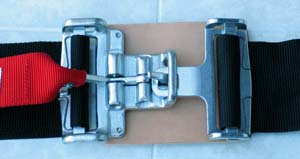 |
The third style of lap-belt is the "duck-bill" pull-down belt. In this style, the tilt-lock adjuster is built right into the main buckle. This design provides more room for the user to pull down on the belts to tighten them. |
Recall that the standard pull-down and the pull-up lap belt each have two portions to the lap belt - one between the tilt-lock adjuster and the vehicle, and one between the tilt-lock adjuster and the main buckle. In a standard pull-down belt, the portion between the main buckle and the adjuster is fixed and the user pulls on the other portion to tighten. In a pull-up belt the situation is reversed - the portion between the vehicle and the adjuster is fixed, and the user pulls on the portion between the adjuster and the main buckle to tighten. With a duck-bill belt, because the adjuster is built into the main buckle, there is only one portion to the belt. One end is attached to the vehicle and the user pulls down on the other end to tighten the belt. |
|
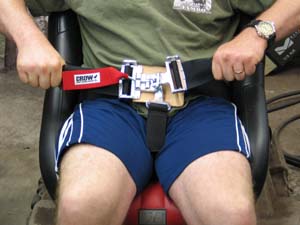 |
This arrangement gives the user much more room for tightening the belt. As with the standard pull-down style, with a duck-bill belt, excess lap belt webbing points towards the seat slot and can be neatly tucked away out of the driver's lap. There are, however, a couple of drawbacks with the duck-bill design. |
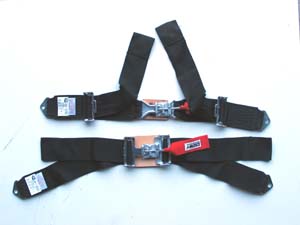 |
First, with a 3" belt, because the adjuster must be 3" wide, the main buckle of a duck-bill belt is much larger and bulkier than a 3" pull-up or 3" standard pull-down belt. Compare here the main buckles on a 3" pull-up belt (top) and a 3" duck-bill belt. Note how the webbing on the pull-up belt is folded over where it connects to the main buckle (in much the same way as it is at the anchor plates), allowing the use of a smaller, 2" wide buckle. |
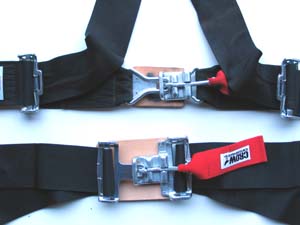 |
Second, because there is only one portion of the belt in a duck-bill lap belt, and that portion must be free to be tightened and loosened, the latch guard (the red tab connected to the main buckle's hammer that you pull up to release the main buckle) cannot be secured to the lap belt with Velco, as it is with standard pull-down and pull-up belts. Duck-bill style belts are also only available in 3", there are no 2" lap belts with duck-bill latches. |
| Ultimately, the choice of lap belt style depends on a myriad of factors including seat design and mounting, cockpit space, driver size and strength, whether the restraint needs frequent adjustment to accommodate different drivers, whether the driver straps himself in or a crew member does it for him (usually from above, making the pull-up style advantageous), and of course personal preference. Here are a few more comparison pics to help you with the decision making process: | |
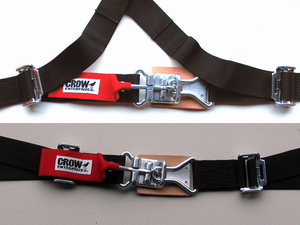 |
2" pull-up style on top, 2" standard pull-down below. As you will see later in the article, I ultimately chose 2" pull-up style belts for the rear bench seat of the rig - not only is there plenty of room inside the bench for the tilt-lock adjusters without fear of discomfort or injury, but I also often find myself turned around and strapping the kids in from above - a situation in which the pull-up style belts really shine (and the pull-down, either kind, quite a PITA). |
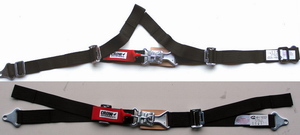 |
2" pull-up style on top, 2" standard pull-down below. |
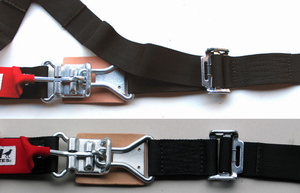 |
2" pull-up style on top, 2" standard pull-down below. |
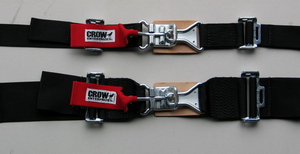 |
2" standard pull-down style on top, 3" standard pull-down style below. |
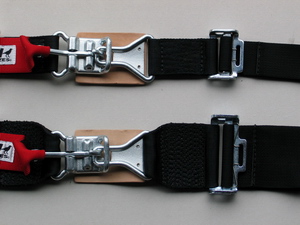 |
2" standard pull-down style on top, 3" standard pull-down style below. |
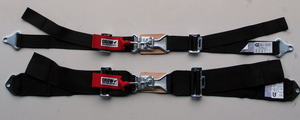 |
2" standard pull-down style on top, 3" standard pull-down style below. |
 |
3" standard pull-down style. |
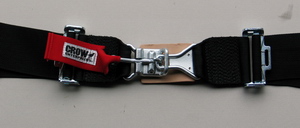 |
3" pull-down main buckle vs. ... |
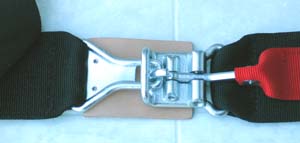 |
3" pull-up main buckle vs. ... |
 |
... 3" duck-bill main buckle. |
Ratings & the SFIMost, if not all, sanctioning bodies have rules regarding driver restraint systems that are to be used for motorsports competition. Typically these rules indicate that any driver restraint system to be used must meet certain minimum specifications. The most common of these specifications in North America is the SFI Spec 16.1 SFI is a non-profit organization established to issue and administer standards for all kinds of specialty / performance automotive and racing equipment. Manufacturers of equipment use SFI standards when designing and producing their products. As mentioned, these standards are often adopted as part of the rules of race sanctioning bodies. Ultimately, the consumer or user benefits from the program because it establishes recognized levels of performance or quality for a product such as driver restraint systems. The specifications are created through a committee process. Technical committees are
comprised of individuals from all facets of the industry who provide a comprehensive
cross-section of knowledge. Such diverse expertise and open participation is the
means by which standards are fairly established.
Participation in the program is purely voluntary, so this does not mean that all manufacturers
not in the program produce inferior belts. Their restraint assemblies may
be just as good as one that is certified, but they merely choose not to participate in The standard that applies to safety belts is SFI Specification 16.1. The spec defines a driver restraint assembly and outlines basic design dimensions and requirements. It also explains the testing procedures in detail and how to interpret the test results to determine if the product meets the required criteria and thus passes the test. Driver restraint systems produced to comply with SFI Spec 16.1 must be labelled as such in a standard fashion. Each such restraint will have three (3) SFI labels - one on the left lap belt, one on the left shoulder belt and one on the anti-sub belt. The date of manufacture must also be indicated on each label. The purpose of the dated certification
labels is to enable drivers and
race officials to easily determine when The reason for the 2-year life span is because the webbing in the driver restraint will break down over time from exposure to sunlight, UV rays, and the elements. Prolonged exposure of webbing and thread to sunlight can cause degradation of the fibres and subsequent loss of restraint integrity. You may see some restraints advertised as being SFI Spec 16.5 compliant. This is the NASCAR specific driver restraint spec that is similar to the 16.1 spec. I haven't read it so I can't compare the two specs directly, but I would assume that 16.5 is at least as stringent at 16.1 and probably more so. Some sanctioning bodies that use SFI specs include: You can read more about the SFI here: http://www.sfifoundation.com Now, all this does not mean an unrated harness is necessarily inferior or unsafe. In fact, quite often you can buy exactly the same harness in an un-rated version simply because the manufacturer has omitted the labels and their associated cost. Also, good manufacturer's will provide a date label even for non SFI Spec harnesses, as they too will degrade over time. Crow Enterprizes does just this. |
|
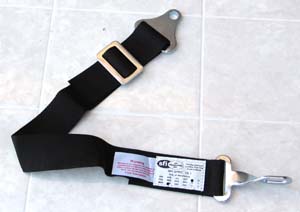 |
SFI label on Crow Enterprizes 2" anti-sub belt. |
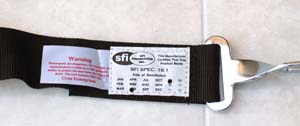 |
Close-up. |
 |
SFI label on left side of 2" lap belt. Note that both 2" and 3" belts can meet SFI 16.1 |
 |
SFI label on left side of 3" lap belt. |
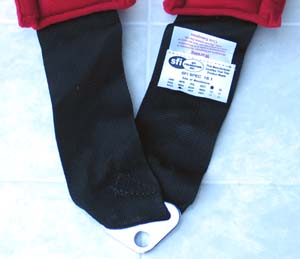 |
SFI label on left side of 3" V-style shoulder harness. |
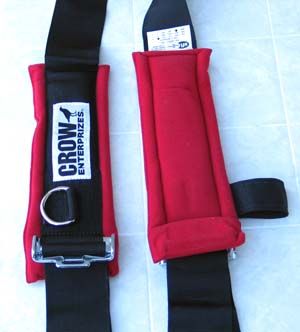 |
SFI label on left side of 3" H-style shoulder harness. |
 |
Date-only label on 2" Y-style recreational harness. Note that Y-style shoulder harnesses do not meet SFI 16.1 and can not be certified / labelled as SFI rated. |
Restraint System OptionsLatches – latch & link, Kam Lock, seatbeltThere are three different methods available for buckling up your driver restraint. Only one is really worthy of consideration for hardcore offroad / offroad racing use, one is an interesting option for a recreational rig, and one belongs only in race cars. Here's the scoop: |
|
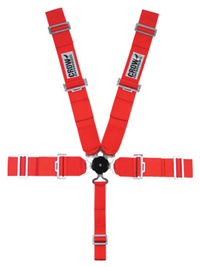 |
The Kam Lock buckle is a rotary buckle that has internal pins and springs that comprise a moving mechanism that locks and releases the buckles on the ends of the lap, shoulder and anti-sub belts. It goes by various other names including: rotary buckle, quick-release, camlock, etc. There are also different methods of releasing the mechanism, ranging from rotating a knob or lever to pressing a button. It is quick, convenient, easy to operate, looks cool, and has no place in an offroad rig! The problem is, the small internal mechanism does not react well to water, dirt, dust, sand, mud and all the other crap offroad rigs are continually exposed to. |
The problem with that is, when the mechanism gets dirty it gets faulty. If this happens when you are trying to strap in, it's very annoying. If this happens when you're crashing and trying to stay strapped in, it can be very dangerous. Most offroad racers refuse to use them and I strongly recommend you don't. |
|
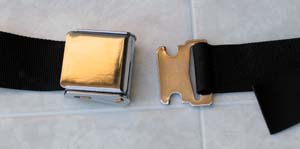 |
There are a couple of specialized restraints that use an automotive-style buckle, as shown at left. These are specialized recreational products that are not well suited to rigorous hardcore or racing use but may be appropriate in a slow-speed recreational rig such as a small sand car or side-by-side. We'll have a look at one such harness a little later. |
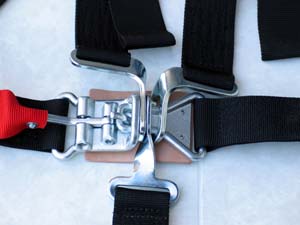 |
The best choice of latching mechanisms for offroad use is known as the "latch and link" buckle. As we have discussed, there are some differences between a pull-up/down buckle and a duck-bill buckle but they both work the same way. Shown is a 2" pull-up latch & link. Recall that the portion on the left lap belt (on the right in this pic) is the link, and the portion on the right (left in the pic) is the latch. To secure a latch & link buckle: lift the hammer, place the belts over the link sandwiching the anti-sub belt between the shoulder belts, insert the link into the latch, firmly press down the hammer until it locks in place with a click, then secure the velcro on the latch guard (the red tab). |
To release the latch & link, simply pull up on the latch guard, releasing the hammer and allowing the belts to fall free from the latch. To be fair, even the latch & link is not totally immune to mud and dirt. If you get into serious mud while one of the harnesses is not occupied, you can get accumulation in the groove where the hammer rides in the locked position and this would need to be cleaned out. The difference is, this can easily be seen and felt and there will be no confusion as to whether the harness is locked or not - either it is or it isn't. In contrast, you cannot easily see or feel the inner workings of the Kam Lock style buckle, resulting in what, to me, would be an unacceptable loss of peace of mind as to whether the harness was fully secured or not. With a little practice, the latch & link can be operated quickly and smoothly and offers complete confidence that the restraint system is fully secured. Both my 5-year-old daughter and 8-year old son have learned to operate the latch & link, although I always check them to verify. That's another advantage to the latch & link - with a Kam Lock style buckle you can't visually verify that all the belts are securely locked into the buckle, you would have to either tug on each belt or release them all and re-insert them until you feel the click as they lock in. OK, so if you've gotten this far you hopefully know how many ways and points you want, the shoulder strap style, the belt widths you want, the attachment method to be used, the style of lap-belt tightening and the main buckle style. There are just a few more options to consider before you're ready to order. The following are completely optional add-on options available for most styles of harness. Tension Springs |
|
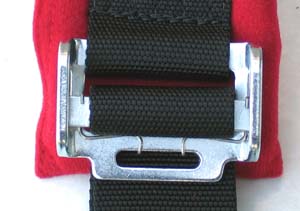 |
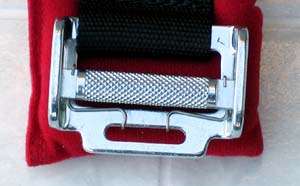
Tension springs are an option that can be added to any tilt-lock adjuster - be they on the shoulder belt or lap belt. As the name implies, they are a simple wire spring that keeps tension on the centre sliding bar of the tilt-lock adjuster to prevent any chance of the belt loosening. You can see how they work by examining the picture to the left and the one below. The picture below has the belt removed for clarity. |
 |
This they do very, very well. I have also found that they make the job of loosening the belt in question more challenging too. Whether or not you wish to use tension springs will depend on your vehicle and its use. If, for example, you are a racer and sole driver of a rig and you tend to strap in tight and stay that way then you would almost certainly want to use them for the added peace of mind. On the other hand, if you and others are constantly in and out of the rig necessitating frequent belt adjustments, you may find they add unwelcome complication. |
In my experience I have found that they make loosening the shoulder belts difficult, but do not significantly affect lap belt loosening. You can always choose to use tension springs on the lap belt and not the shoulder belts, or vice versa. Finally, the springs themselves are not terribly difficult to install or remove, nor are they very expensive, so the best bet is probably to order them, try them, and remove them if you really don't like them. Personally I am currently running tension springs on all belts. They will definitely stay on the lap belt, but I am undecided on the shoulder belts - they do make loosening a challenge but I really enjoy the confidence of knowing the belts won't loosen. Harness Pads |
|
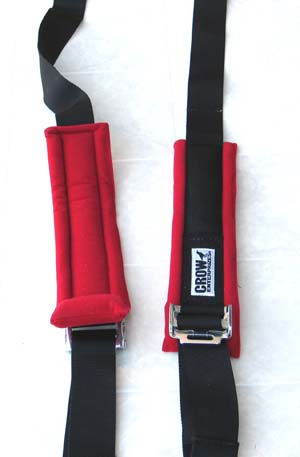 |
Sewn-in harness pads are an available option for all shoulder straps. Here they are shown installed on a 2" belt. They come in black, blue, grey, or red. I absolutely love them! They make the harness so much softer and more comfortable to wear I can't see being without them ever again. In a sense, they also add a safety dimension - because if the harness is more comfortable, you and your passengers are more likely to wear it. The kids also like them , which keeps them happy, which keeps Dad happy! Although I have heard some people say they don't like them because of the extra bulk I wonder if that isn't partially an issue with how the harness is mounted, adjusted or worn? In my opinion, no matter which harness you get, always, always get the sewn-in harness pads! |
 |
Here the sewn-in pads are shown on a 3" H-style harness. |
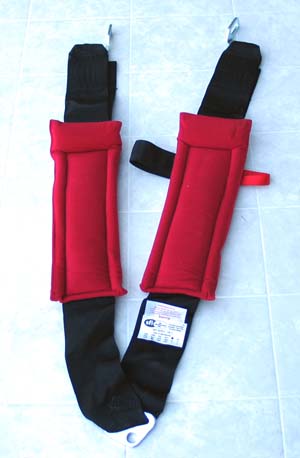 |
And here they are on a 3" V-style harness. Of course, as they are sewn on, you have to make the decision on the pads at the time of purchasing. There are add-on pads also available that use Velcro to attach to the harness. These I must admit I do not find comfortable and I did find them bulky and obtrusive. The hard edges of the Velcro attachment are also uncomfortable against any bare skin. Bottom line - get the sewn-in pads. Trust me - you will thank me! |
Sternum Latch |
|
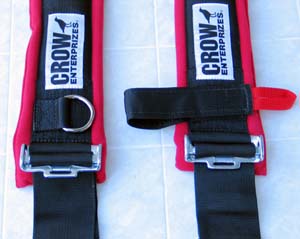 |
Another available option is the sternum latch. Available in two styles, either Velcro (as shown) or with a small latch & link buckle, the sternum latch is used to connect the two shoulder belts together at the sternum (breast bone). |
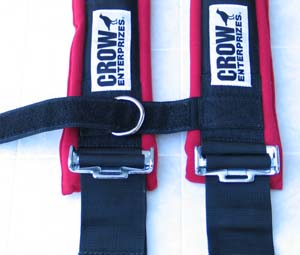 |
I chose the velcro style which is light, easy to use, and fairly unobtrusive whether it is connected or not. |
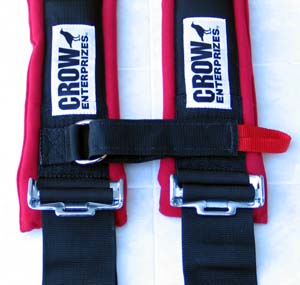 |
When connected, the sternum latch adds a significant extra margin of security as it prevents the shoulder straps from separating. In practice, use of the sternum strap provides an enormous increase in how secure the driver feels in the harness. With properly adjusted and tightened straps and the sternum strap done up you feel extremely secure in the seat. Again, whether or not you wish to use a sternum strap will depend on your vehicle and its use. For the racing and extreme crowd they provide a welcome increase in security. However, if you are riding without the sternum latch connected, especially if your shoulder straps are a little loose, the loose strap can be a little obtrusive. |
Choosing a Restraint System - examples, opinions & findingsNow that we've had a look at the details of driver restraint systems, let's have a closer look at some of the offerings from Crow Enterprizes and why Crow should be at the very top of your shopping list. Crow Enterprizes has been in business since the late '90s. They pride themselves in service that is second to none with fast shipping, competitive pricing and knowledgeable sales staff. They are also racing/automotive enthusiasts. Fred Crow has 37 years of experience manufacturing automotive racing safety equipment. With the generous support of Crow Enterprizes I was able to test and trial a variety of different restraint systems to get a practical hands-on feel for a good cross section of all the features and specs we've been discussing. In the front I tried:
And in the rear bench I tried:
Here's a look: 5-way, 5-point, H-style, 3", duck-bill |
|
 |
5-way, 5-point, H-style, 3", duck-bill latch & link, bolt-in driver restraint in black with tension springs, sewn in harness pads (red) and Velcro sternum latch, SFI 16.1 rated. Quite a mouthful! |
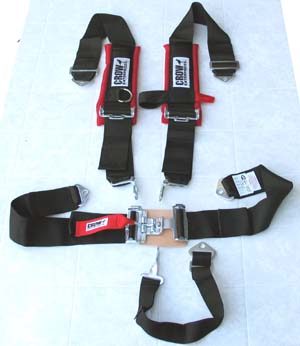 |
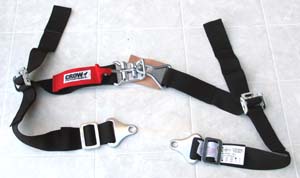
The complete assembly laid out. Note the vehicle ends of the shoulder straps use a 3-bar slide, meaning they are adjustable for length and can quickly and easily be converted back and forth between wrap-around and bolt-in. Note the 2" anti-sub strap.
|
 |
The lap belt. Note the sewn-in anchor plates and the "single portion" belt between anchor plate and main buckle. Note how the latch guard cannot be secured to the lap belt with Velcro. |
 |
Duck-bill latch & link main buckle. Note the tension springs installed and the 3" width of the buckle assembly. |
 |
Velcro sternum latch. |
 |
Velcro sternum latch, connected. |
 |
Sewn-in red padding on 3" shoulder belts. Note the SFI tag on the left belt. |
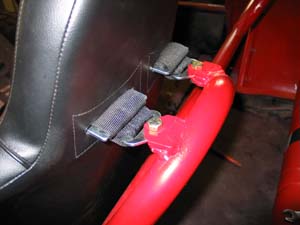 |
Mounted bolt-in 3-bar slide individual shoulder belts. |
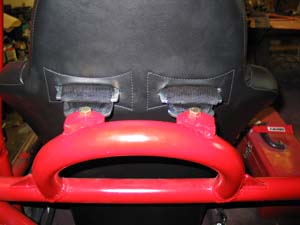 |
There's quite a bit to consider in proper harness mounting, so much that a separate article is required. There are also quite a few common mistakes and pitfalls that I will be addressing in Part 2. |
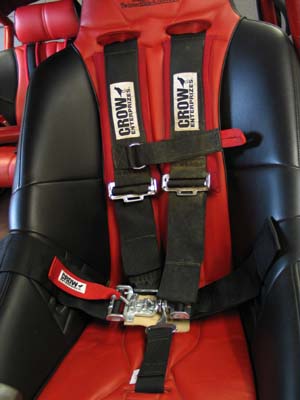 |
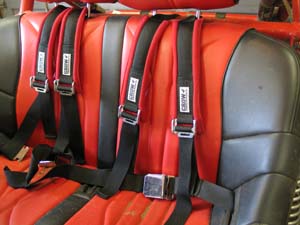
Installed restraint system. This is the system I ultimately settled on for the front seats. I like the combination of the individual shoulder straps and 2-slot seat which provides ideal belt placement on the shoulders with no chance of neck rubbing. I started with tension springs on all tilt-lock adjusters, but found it made the shoulder strap tilt-locks too difficult to loosen and tighten for the number of times I adjust them to suit conditions. If I were racing, where one tends to strap in tightly and stay put during the race, I would have left them in place. I retained the springs in the lap-belt tilt-locks. The Velcro sternum strap is occasionally in the way when it is not secured and I have the shoulder belts a little loose. However, there's no denying the security when I strap in tight and connect it so I'm glad I have it. The sewn-in padding is wonderful! The duck-bill lap belt was the best compromise for my rig / seat / body. I can quickly and easily tighten and loosen it as required. The size of the buckle doesn't bother me, although my wife finds it a little cumbersome.
|
5-way, 4-point, V-style, 3", pull-up |
|
 |
5-way, 4-point, V-style, 3", pull-up, latch & link, bolt-in driver restraint in black with tension springs, sewn in harness pads (red) and Velcro sternum latch, SFI 16.1 rated. |
 |
The lap belt. |
 |
Small 2" wide pull-up latch & link buckle. |
 |
Pull-up tightening mechanism. Note the sewn-in anchor plate, 2-portion construction, short coupling between anchor plate and tilt-lock adjuster, and SFI tag. |
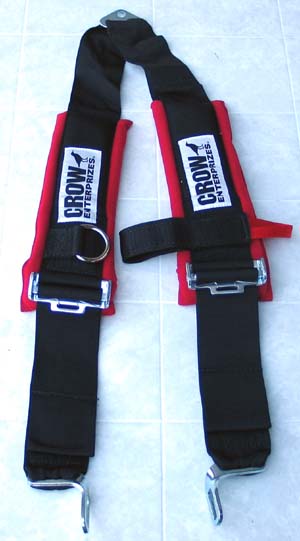 |
The 3" wide V-style shoulder harness with sternum latch and sewn-in pads. Note lack of adjustment between single anchor plate and tilt-lock adjusters. |
 |
Sewn-in anchor plate on V-style shoulder harness. |
 |
Sewn-in padding and SFI tag on 3" V-style shoulder harness. The pull-up style lap belt has definite advantages - especially the ease of tightening and the smaller profile main buckle. It is a great choice if your seat / rig allow installation so that you can reach the tilt-lock outside the seat. Unfortunately my seat and rig don't have the necessary room and so I switched to the duck-bill style lap belt. The V harness is great for cramped locations and installation where you only have / want one mounting bracket behind the seat. The lack of adjustment between the anchor plate and tilt-locks is a disadvantage - meaning you have to get seat placement, anchor placement, and driver size all right the first time for this harness. Using the V style with a dual-slot seat is something of a pain as you have to feed the shoulder straps through from the back of the seat - meaning you have to get the bulky harness pads and tilt-lock adjusters through the seat. Using the V style with a single-slot seat, if the mounting point is not immediately behind the seat slot you may experience neck rub. |
5-way, 5-point, H-style, 2", pull-up |
|
 |
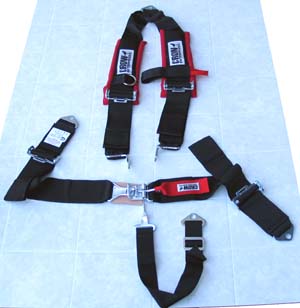
5-way, 5-point, H-style, 2", pull-up, bolt-in driver restraint in black with tension springs, sewn in harness pads (red), SFI 16.1 rated. |
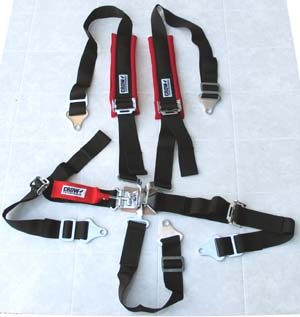 |
The complete assembly laid out. Note the vehicle ends of the shoulder straps use a 3-bar slide, meaning they are adjustable for length and can quickly and easily be converted back and forth between wrap-around and bolt-in. Note also that, in contrast to the 3" pull-up style belt shown above, this model's lap belt also uses a 3-bar slide, meaning they are adjustable for length between the mounting bracket and the lap belt tilt-lock adjuster. |
 |
2" anti-sub strap with SFI tag. |
 |
2" pull-up lap belt. Note SFI tag on 2" belt. |
 |
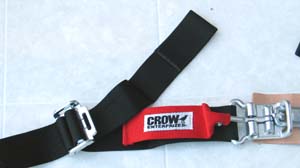
2" Pull-up tightening mechanism. Note that red latch guard can be secured with Velcro to short, fixed coupling between tilt-lock adjuster and main buckle. |
 |
2" shoulder belt tilt-lock adjuster with tension spring installed. |
 |
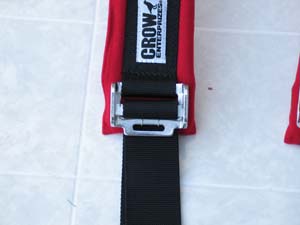
2" shoulder belt sewn-in padding. |
 |
2" latch & link main buckle in secured configuration. Note the orientation of the shoulder strap buckles and the sandwiching of the anti-sub strap between them on the link. On the far left of the latch, just before the latch guard, note the spring-loaded ball bearings that lock the hammer in place in the closed position. This area merits particular attention and regular cleaning. |
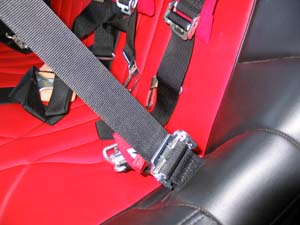 |
I really, really like the pull-up style lap belts in the rear bench for the kids. Most of the time I am turned around from the front seat and positioned over the kids when I'm strapping them in. The pull-up are perfect for this and much more convenient than having to hop out and pull down from outside when securing the offspring. |
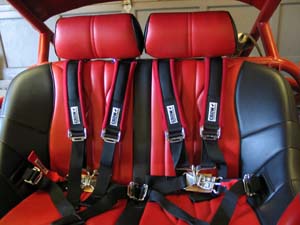 |
There's plenty of room inside the bench for the lap belt tilt-locks without any safety or discomfort concerns with them being "inside" the seat. |
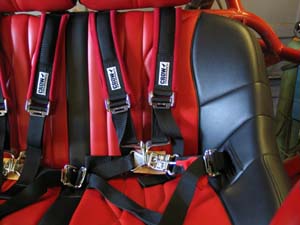 |
When the kids tighten themselves in, being not as strong as an adult, they enjoy the extra leverage and easier tightening of the pull-up style. |
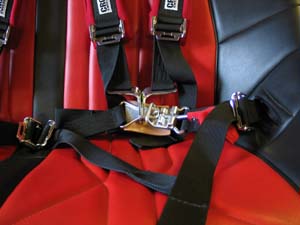 |
The 2" webbing and smaller main buckle are also ideal for kid-sized humans. |
 |
Mitchell is 8 and Jessie is 5 and they're both safe and happy in their new seat and restraints. |
 |
They both really appreciate the sewn-in shoulder strap pads. |
 |
Comfortable, happy, safe, kids - critical for a good day on the trail. |
4-way, 3-point, Y-style, 2" with auto buckle |
|
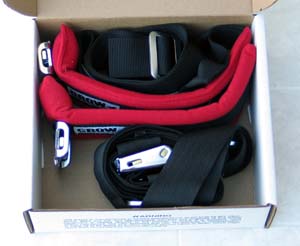 |
The final restraint system we shall look at is a unique one. |
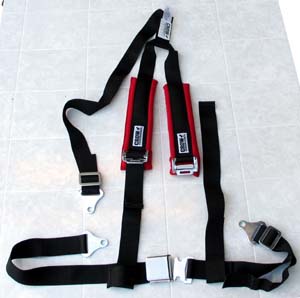 |
Marketed as a "sand car" recreational restraint, it's a 4-way, 3-point, Y-style, 2" harness with automotive style buckle and bolt-in anchor plates. There is no anti-sub belt or sternum latch but you can get tension springs and sewn-in harness pads as options. It's not SFI rated. Probably not suited for racing or the most hardcore use, it nevertheless has some attractive features that may make it the right choice for the right vehicle / driver combination. Both the lap belt and shoulder harness use 3-bar slides and so are adjustable for length in installation. |
 |
The shoulder straps use a Y-style harness with a single wrap-around / bolt-in attachment. |
 |
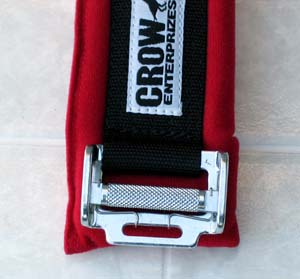
The main buckle is the "insert-to-lock-lift-to-release" style buckle common in older automotive belts and airline passenger seats. It's extremely easy to operate. The buckle has only one side that tightens, the other side is fixed in length (once the 3-bar slide has been adjusted on installation), just like an airline belt. |
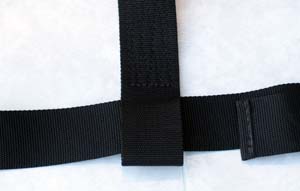 |
Because of the style of the main buckle, the shoulder straps attach to the lap belt with a loop of webbing. |
 |
The shoulder straps use a conventional 2" tilt-lock adjuster, shown here with optional tension spring installed. |
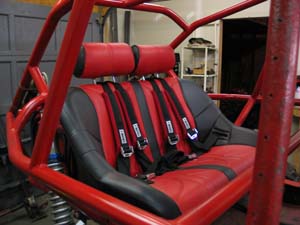 |
I trialed this system in the rear bench seat where the kids sit. It was light, easy to install, and extremely easy to operate. |
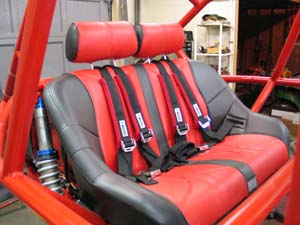 |
The kids were easily able to get in and out of the harness themselves and their small hands had no trouble operating the buckle. |
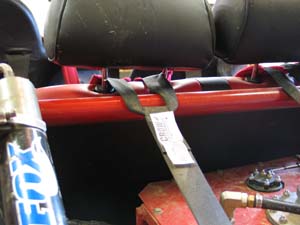 |
The Y-style shoulder harness worked well with the bench seat headrests, even given the kids short stature. |
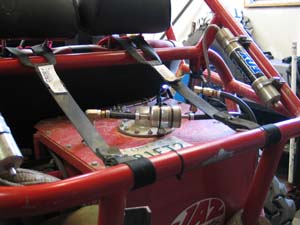 |
I went with wrap-around mounting of the shoulder harnesses...
(Yes, I know there's an error shown in the picture, we'll discuss mounting in Part 2!) |
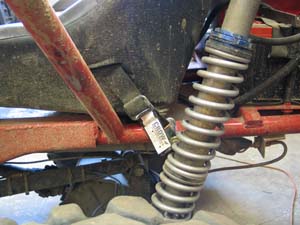 |
... and bolt-in for the lap belts. |
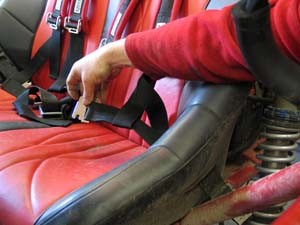 |
The tab end of the lap belt (left side) is fixed, and the right side is tightened at the buckle. |
 |
Light, comfortable, easy to use, and secure enough for mild use I eventually removed this set in favour of 5-way, 5-point 2" pull-up system for the kids. The reason why is that the buckle was almost too easy to operate. My kids are still young and a couple of times I found that my 5 y.o. daughter had inadvertently released her buckle, probably from fiddling with it. This will likely not be an issue with older riders. |
SummaryThere are a great many options and factors to weigh when purchasing a driver restraint system. The driver, the seat, the vehicle, mounting locations, how much modification / fabrication you can/want to do, intended use, racing and sanctioning rules, and of course a good deal of personal preference. The good news is - every one of Crow Enterprizes' driver restraints is a top quality product - materials, construction, and available options are all top notch. All the little details are taken care of - for example, the webbing itself is weighty and substantial feeling without being rough or coarse. A perusal of their web site shows the dozens of common systems / combinations available - and as if that weren't enough they can custom make for you just about any combination you can dream of. For such an important purchase - you can't go wrong by going with Crow. Here's a summary of the most salient points I discovered during my recent research and practical experience with Crow driver restraints: (Keep in mind these are my personal opinions, thoughts and feelings)
ConclusionAs I said, driver restraints are deceptively simple but there is a lot to consider in choosing the right one for your rig and driving style. By now you should have a good idea of the many options available and what will work for you. But we're only halfway there. In order to be effective, any restraint system must be:
Like a chain with a weakest link – if any one of these things is below standard disaster can result. In other words, the best quality restraint installed to exact specifications is no use if it isn’t worn or maintained properly. In Part 2, next month's article, we will be looking at installation, adjustment, wearing, and maintenance of driver restraint systems. References: |
|
 |
Sources: Crow Enterprizes160 E. Freedom Ave. PolyPerformance 245 Tank Farm Rd. |
|
