 |
12Volt Guy Switch Panel Review By Bill "BillaVista" Ansell |
IntroductionThis is a review of an awesome product that forms the cornerstone of my buggy's electrical system. Wiring a whole vehicle is something you either love or hate. I happen to enjoy wiring, but there are still some things it's awfully nice to have someone else do or help with - especially when that person is a craftsman! For me - having the patience to neatly lay stuff out perfectly is always a challenge - maybe because I'm always short on time and long on projects to do.
|
 |
That's why I decided to have 12Volt Guy make me one of his custom switch panels. After all - it's RIGHT THERE - front and centre of the dash, and I didn't want some wobbly, half-baked, crooked-line, triangular-hole thing. Plus - there's no way I could do the custom engraving. Plus - by the time you price all the quality parts, get them shipped, and then consider all the time it takes to hand-build it - the price is very reasonable. Enough preamble - on to the pics. |
|
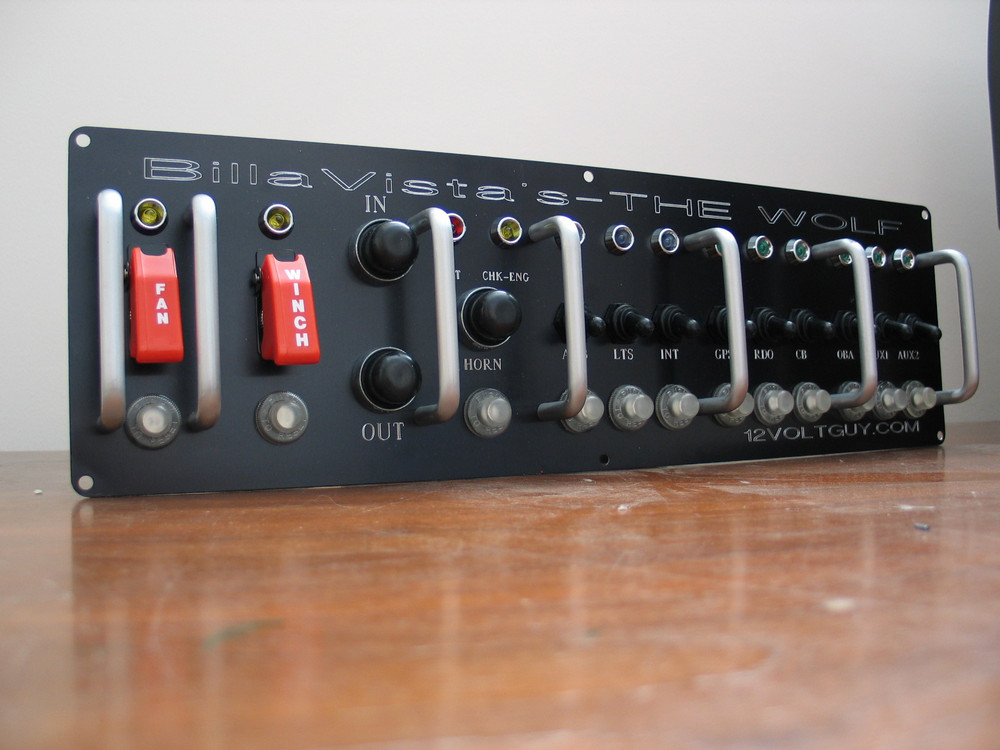 |
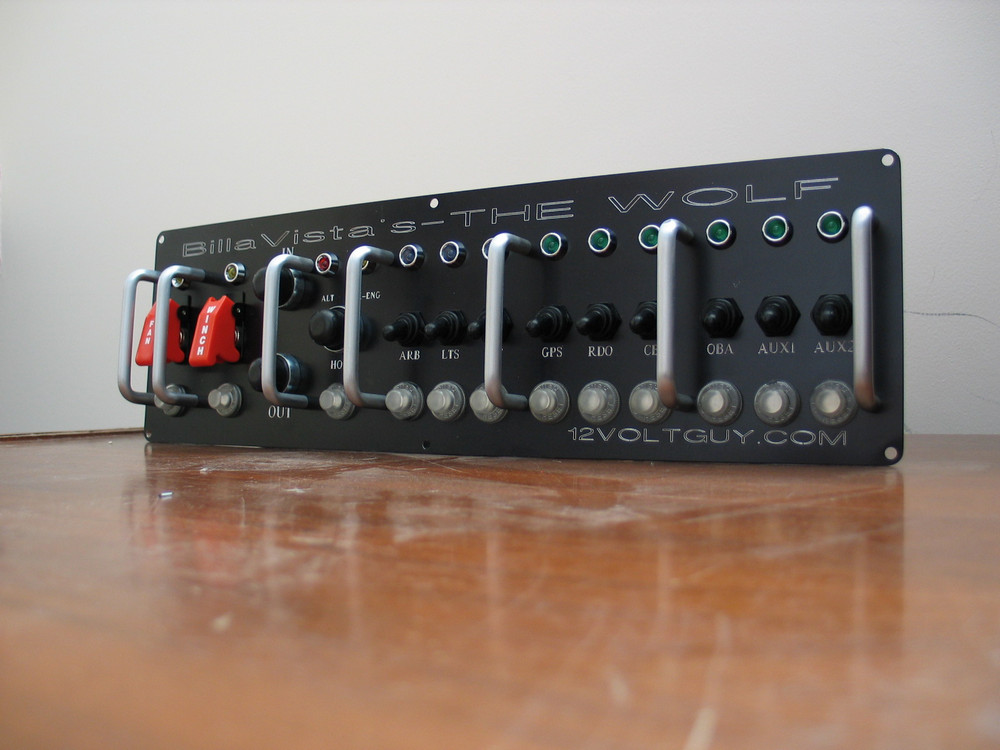
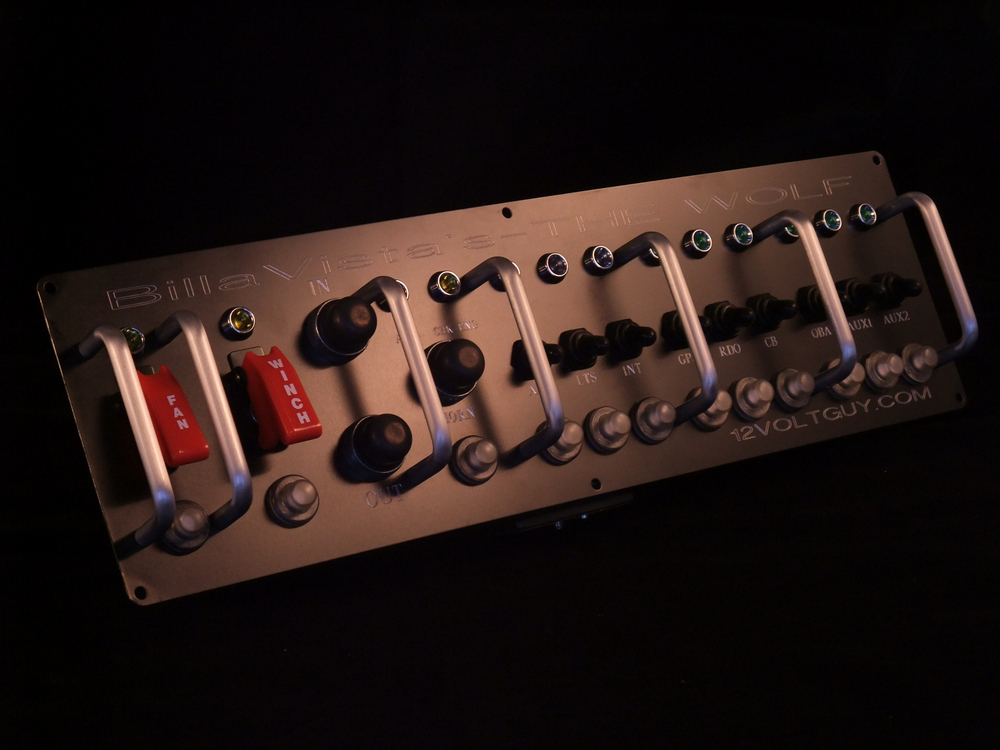
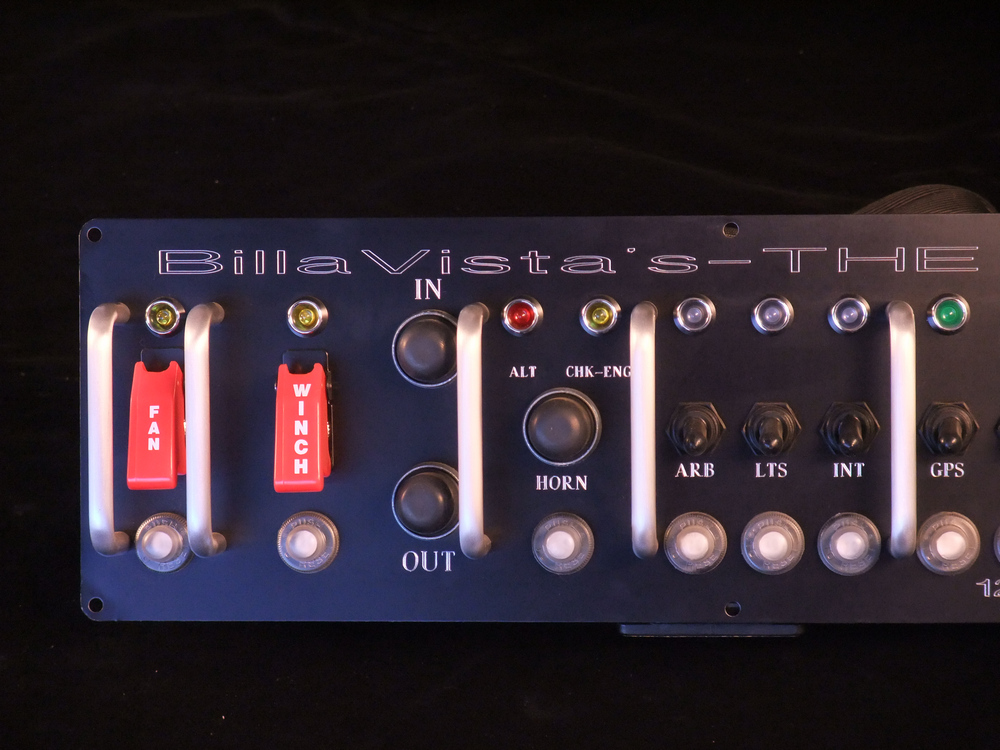
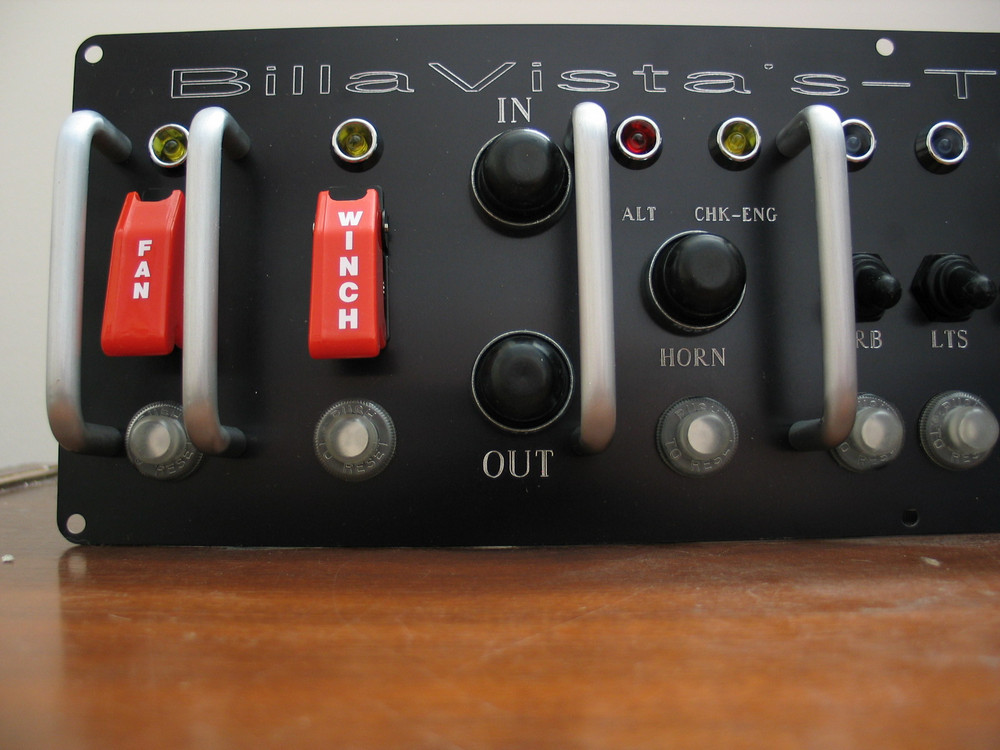
This is my main switch panel. | ||||
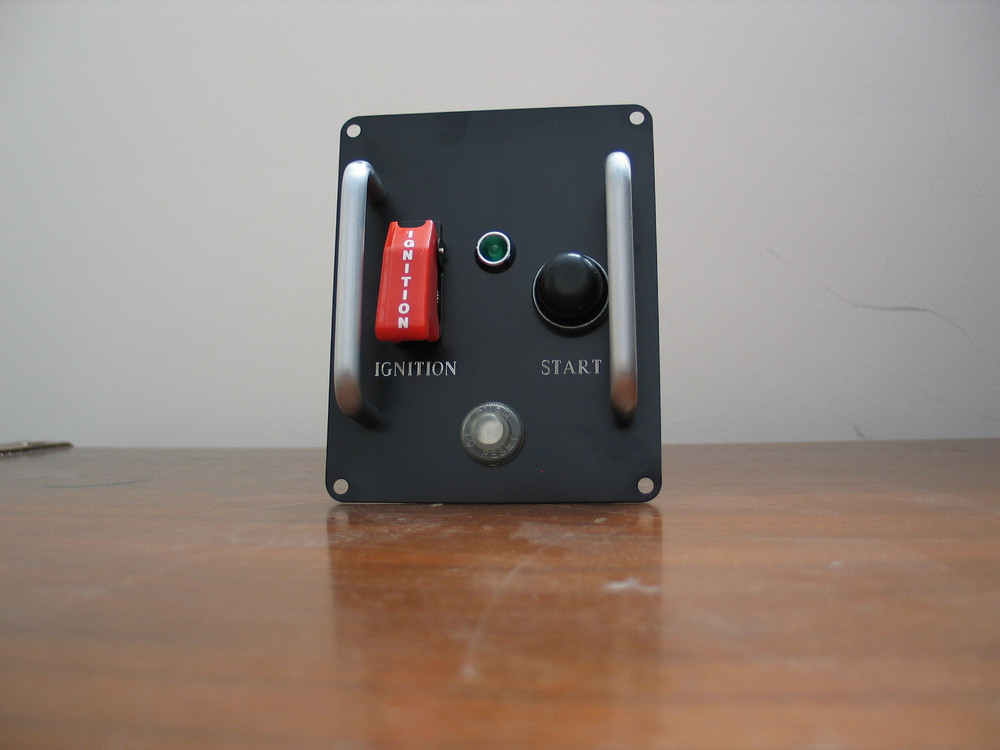 |
And this is the ignition / start panel. The reason I wanted the ignition / start panel separate from the rest is so that I could place it where I can always reach it when tightly belted in, even if I'm upside-down. We'll see this later in the installed pics. |
||||
 |
12Volt Guy has been making switch panels for several years and can build anything you want or need. | ||||
 |
If you can dream it up, he can build it. | ||||
 |
Options include things like the:
|
||||
 |
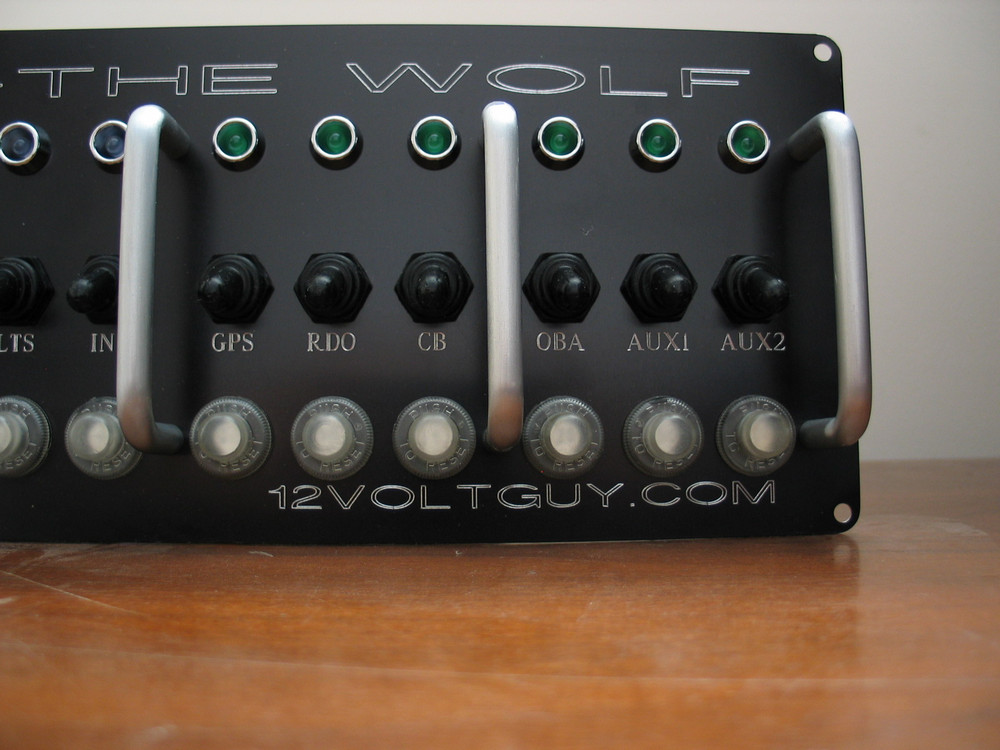
I chose the LED colours based on the scheme: Red = Warning Yellow = Caution Blue = Be Aware Green = Power on, normal. |
||||
 |
Using this logic, I get: A Red "warning" if the alternator is not charging A Yellow "caution" if I have: turned off the fans, there is power to the winch controls, or there is a check-engine light (trouble code stored). A Blue "be aware" if the ARB compressor, exterior lights, or interior lights are powered on. A Green "power on" for all the other switches that power individual accessory circuits. |
||||
 |
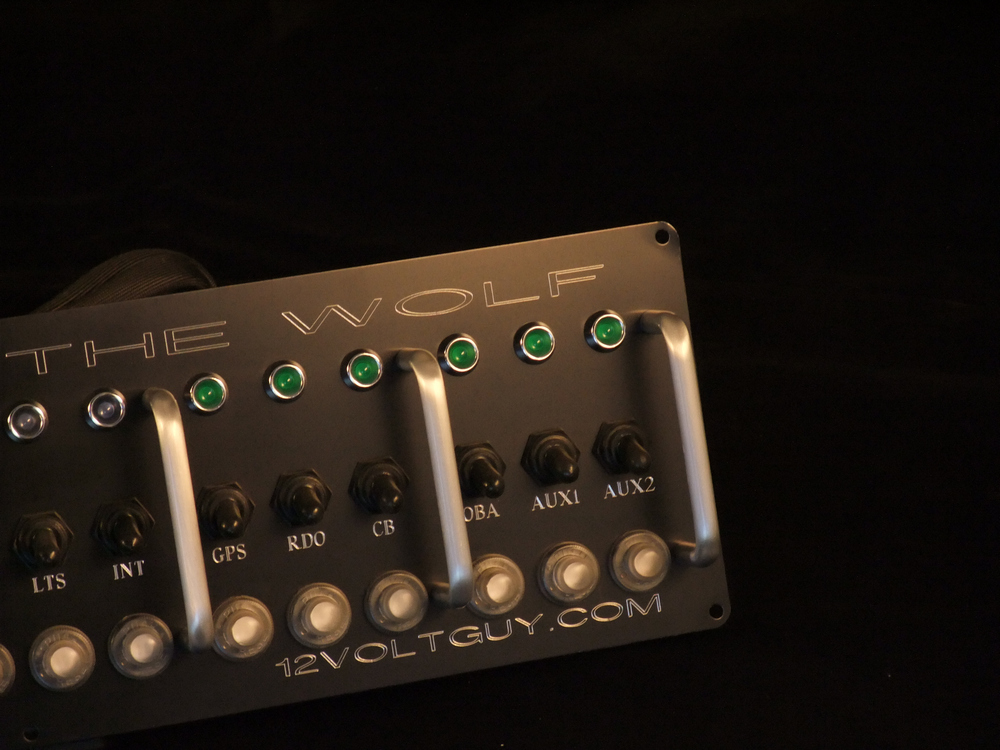
The switches are all weather-proof, rubber coated units, as are the circuit breakers. Each switch is clearly labelled with custom engraving (won't peel off or fade). |
||||
 |
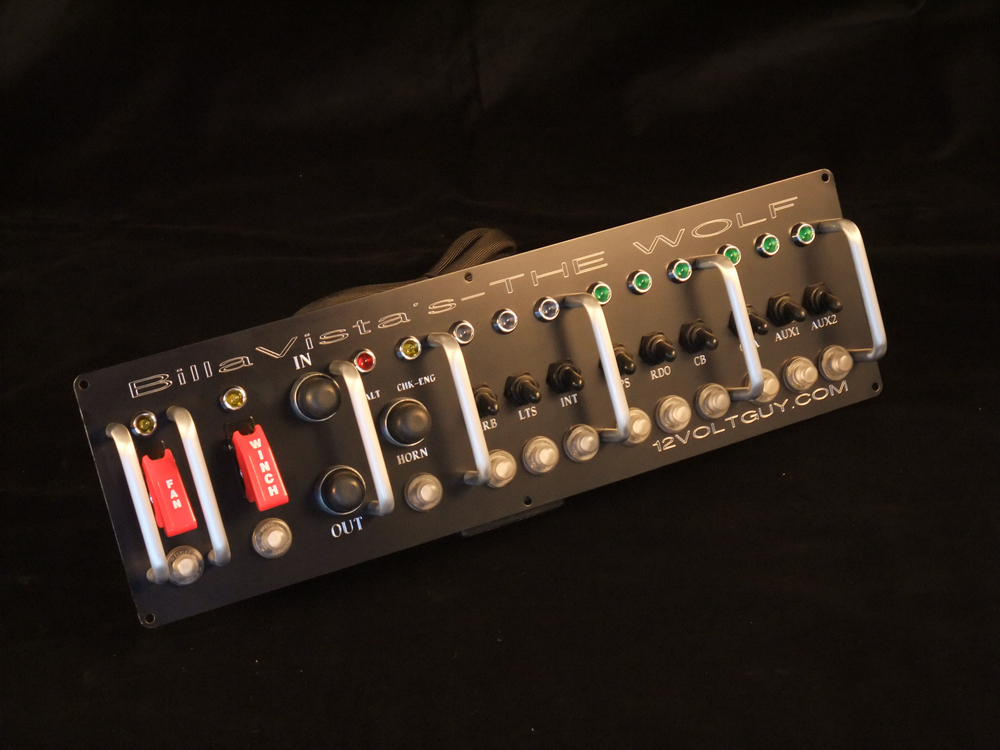
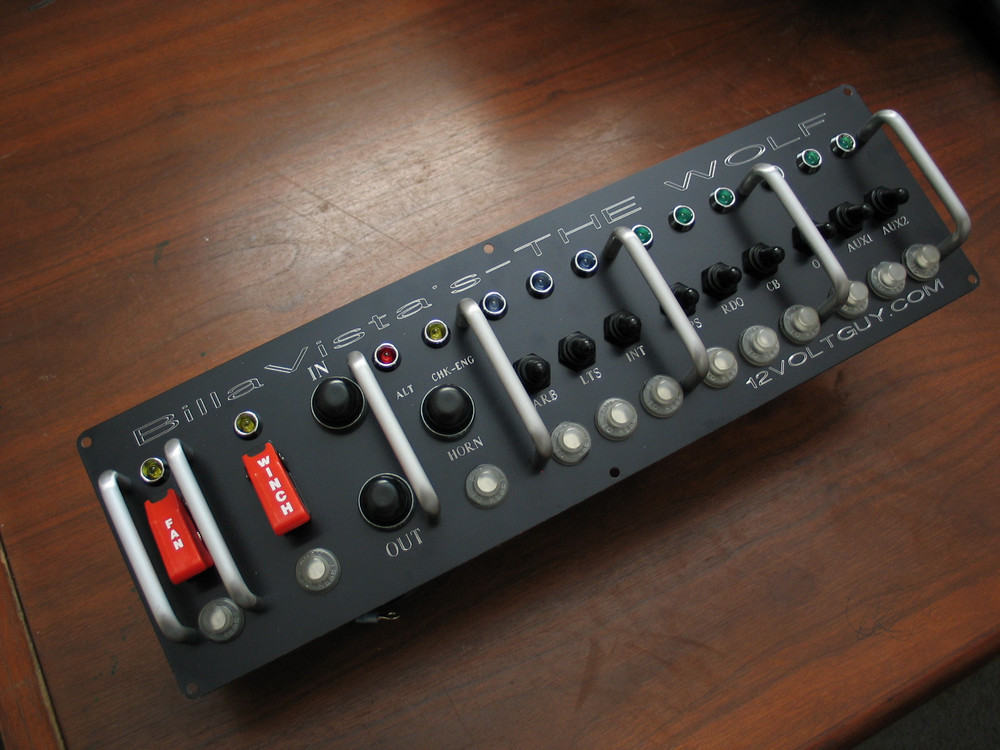
Like I said - everything is perfectly aligned and laid out - square and straight. | ||||
 |
My panel includes integrated in-cab winch controls. The IN & OUT controls are spring-loaded, momentary push buttons for safety. |
||||
 |
With the custom engraving added, it looks awesome! And that's just the front. |
||||
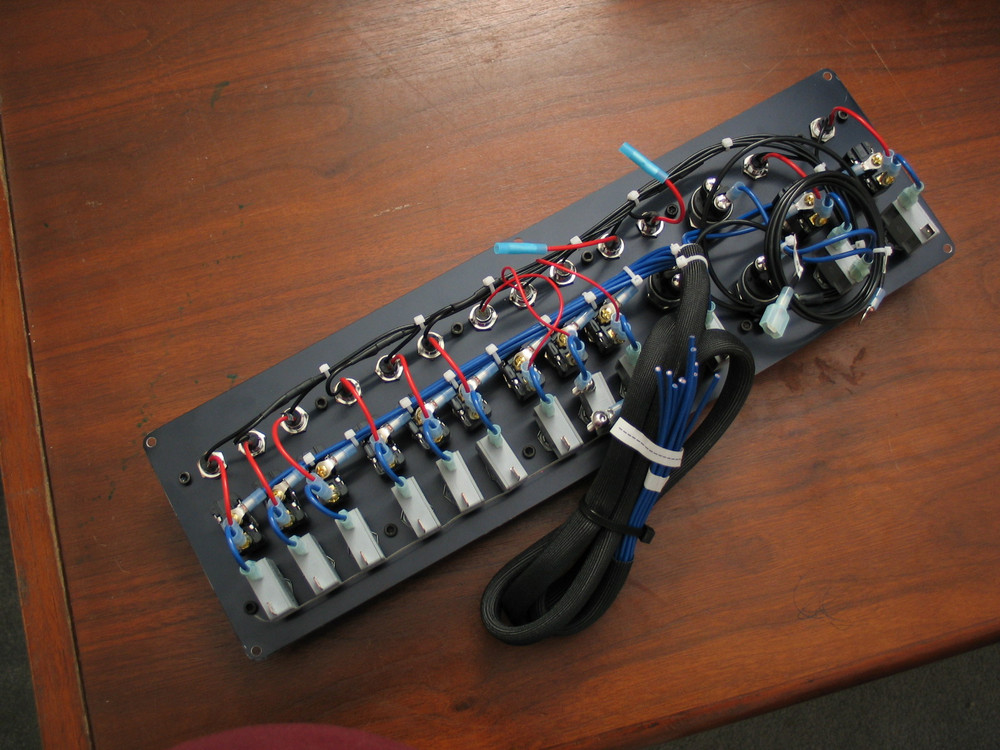 |
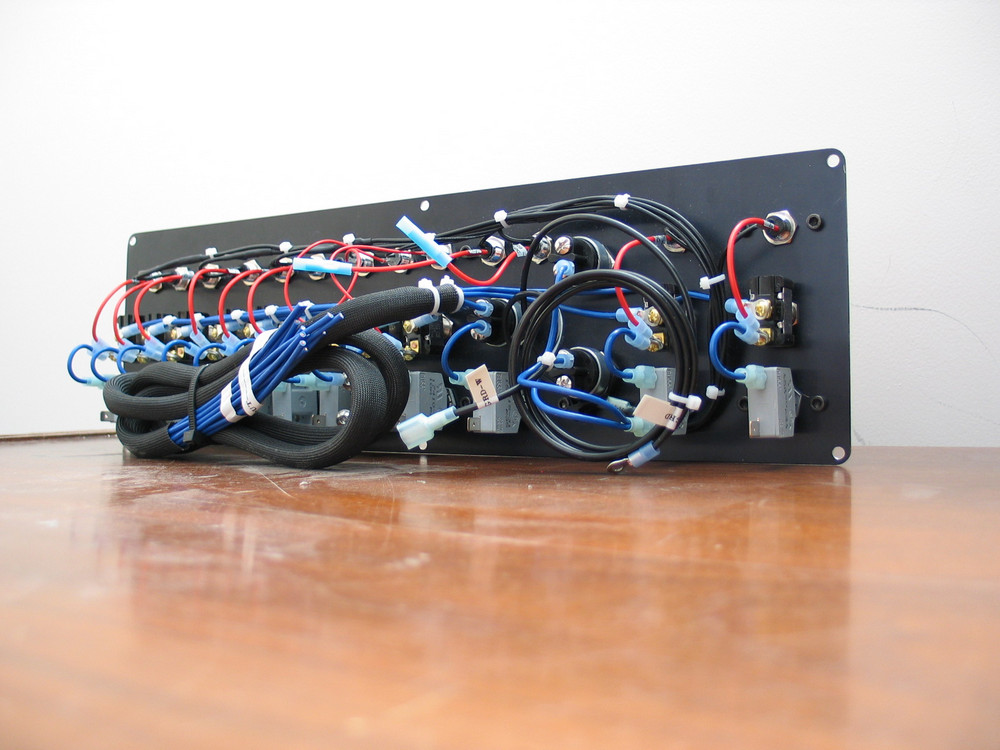
The real craftsmanship comes behind the panel with the clean wiring job. | ||||
 |
If you can wire the rest of your rig as cleanly as this, you have it made! | ||||
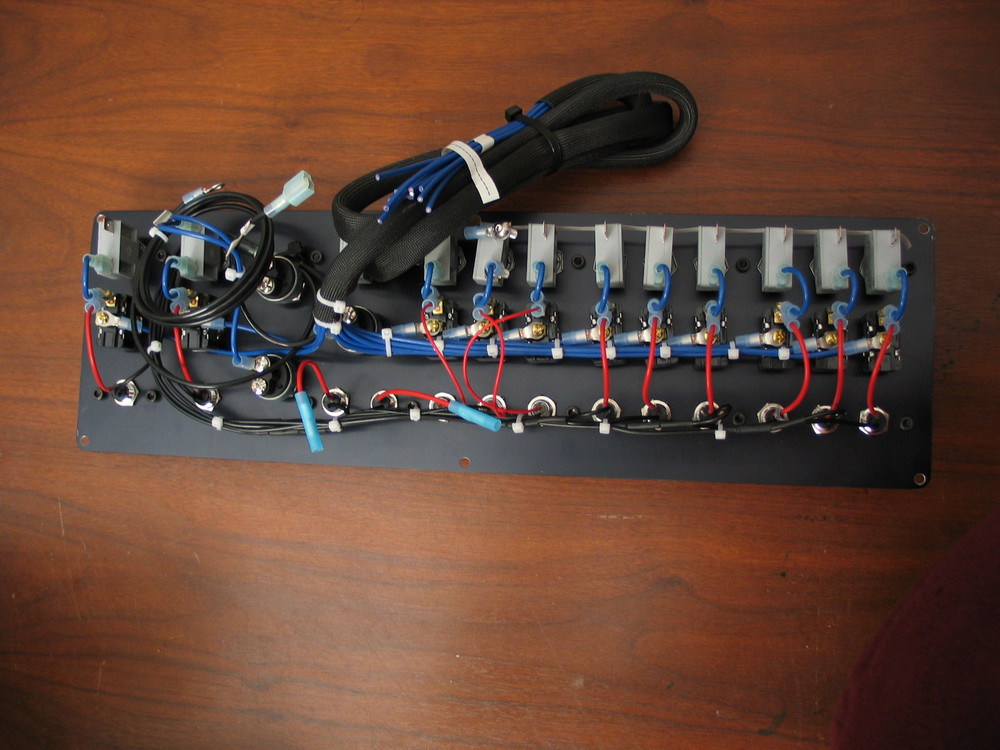 |
As-shipped, the panel came setup for power to be supplied to the blue wires for each switch, and then power out from the CB to go to the component. Personally, I prefer to have the power come into the CB first, then through the switch and on to the component in question (I'll explain why when we get to Part 4!) It only took me a few minutes to switch things around, but what I should have done is ask 12Volt Guy to wire it that way for me in the first place. He is very accommodating and, as I mentioned, can and will happily custom make you anything you want. |
||||
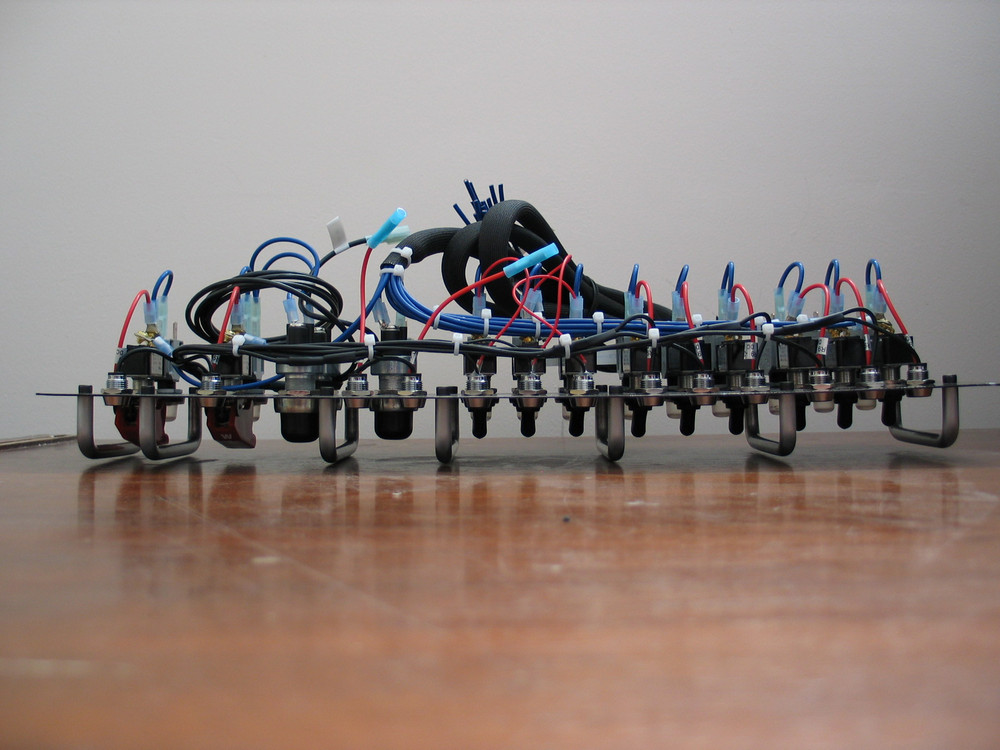 |
Cool shot! | ||||
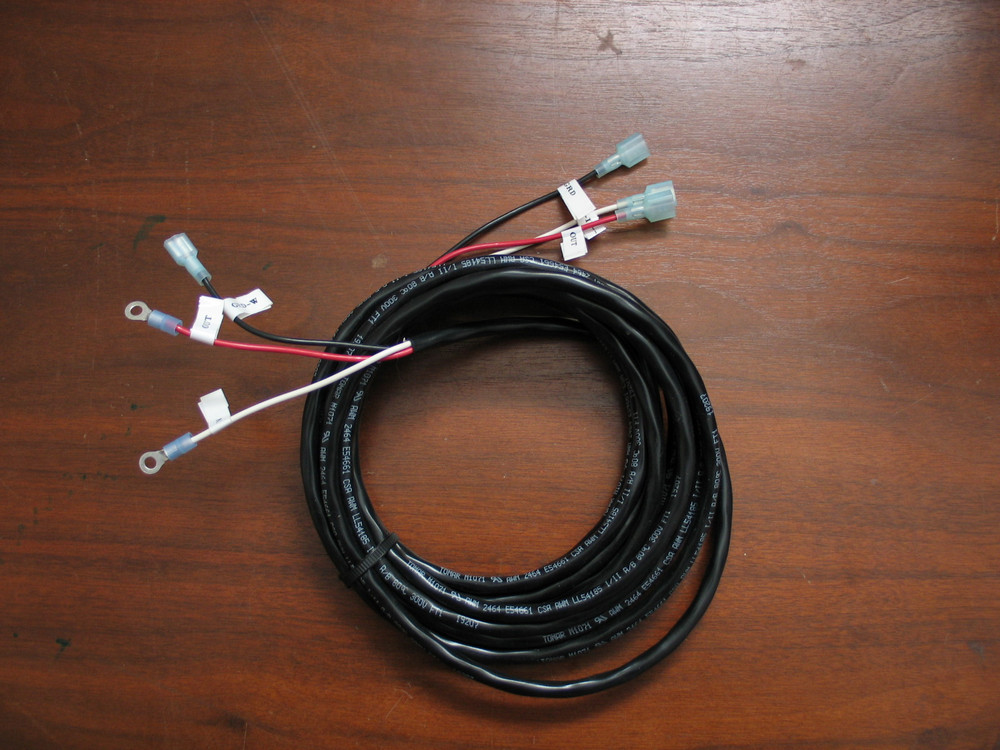 |
The winch controls come with a generous supply of wire to reach from your panel to the solenoid pack on your winch. They also come with good instructions if you're not sure how to wire them up. |
||||
 |
My separate ignition / start panel similarly came with plenty of wire to reach the starter motor. | ||||
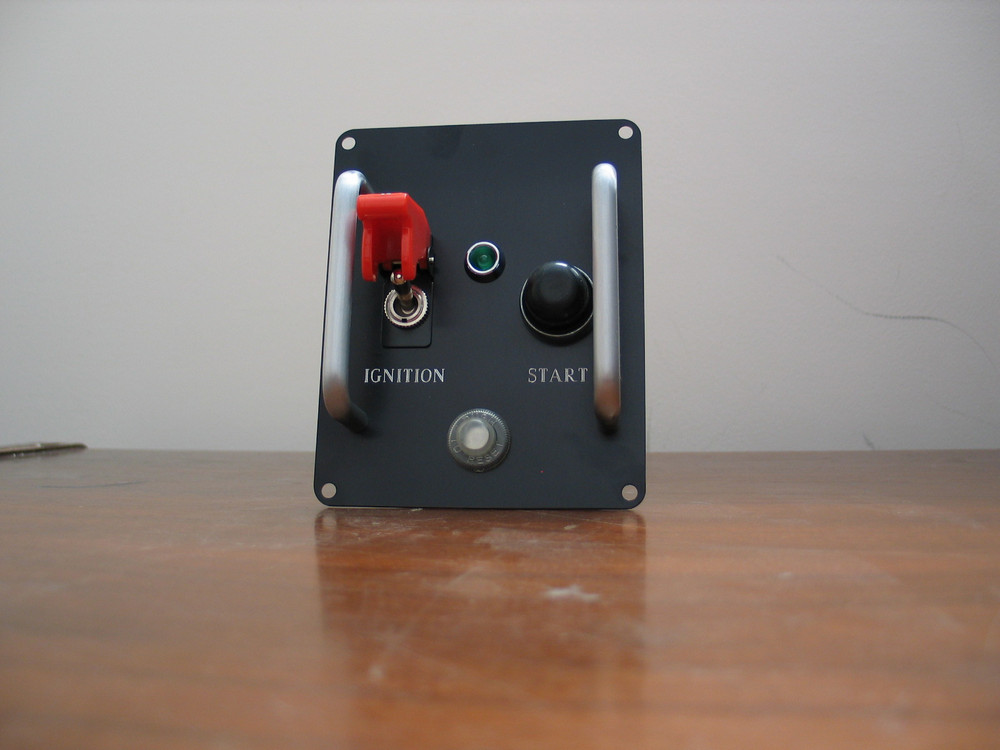 |
Ignition switch is an aviation-style covered switch. These switches are used:
|
||||
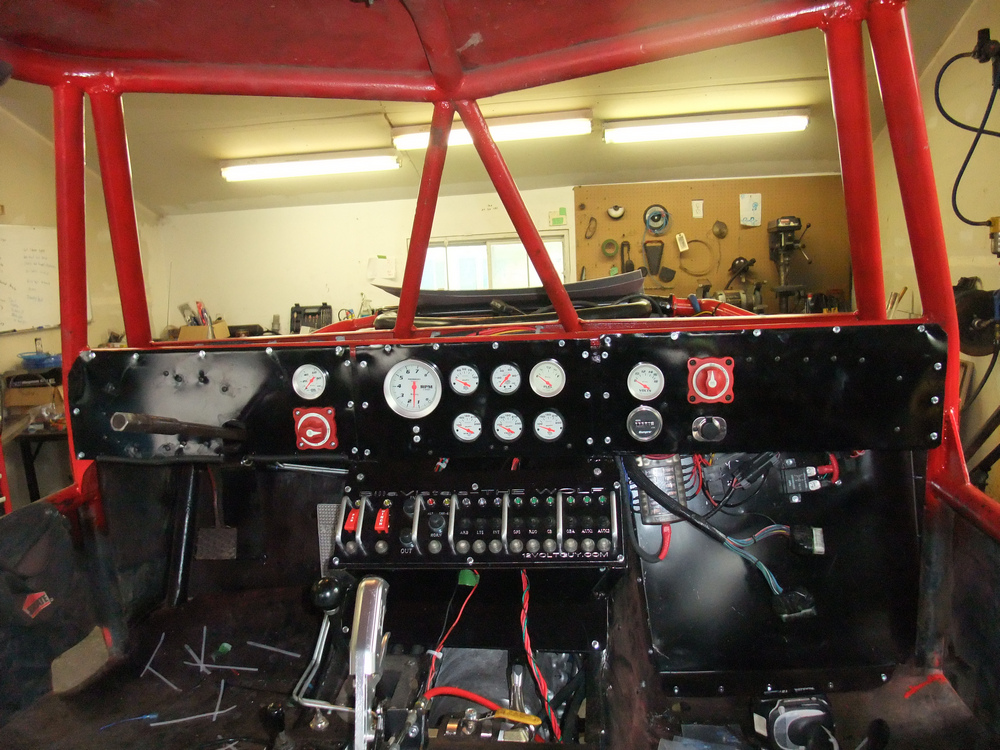 |
Here's an installed shot of the main panel - centred in the rig just below the gauges. In this location, switches can be reached by both driver and co-driver. |
||||
 |
Installed close-up. | ||||
 |
Here you can see the ignition / start panel mounted low and back, just to the right of the tranny shifter. | ||||
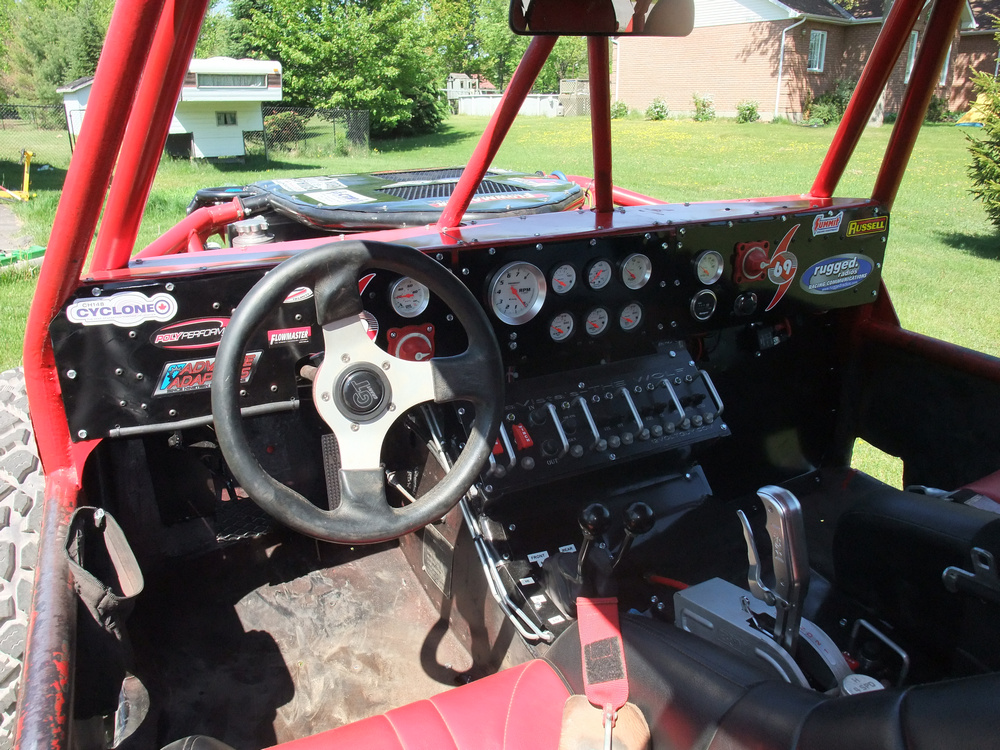 |
In this position, I can easily reach down with my right hand and find the ignition switch and starter button, without looking, even when strapped in tightly. | ||||
12Volt Guy doesn't just make custom panels though. He has a whole range of "stock" layouts and popular panels you can choose from, including those designed to integrate well into stock vehicle dashboards. He also carries a whole range of products for wiring your rig or daily driver, including fuse panels and fuses, circuit breakers, knobs, switches, distribution blocks, relays, solenoids, LED's, winch controls, dual-battery panels, etc. Check it all out at http://www.12voltguy.com |
|||||
|
|||||
 |
Sources: The 12 Volt Guy 530.532.4529 |
|

