 |
Site Tutorial By Bill "BillaVista" Ansell |
IntroductionDespite the dire warnings of my friends who are experts in modern web design, the articles here are done in a particular and non-conventional style. This page explains some tips and tricks to navigating the site and getting the most out of it. The Navigation BarsThe Navigation Bars are common to each page in the site, and can easily be reached from anywhere in any page by either pressing <Ctrl-Home> to get to the top or <Ctrl-End> to get to the bottom [ <Cmd-Home> and <Cmd-End> on a Mac ]. The IndexesThere are two indexes to the tech articles. Each contains the same information, but they are organized differently. They are provided to help make it easier to find what you want to read, depending on your needs. The "main" index is the once reached by pressing the "Tech Articles" button in the Nav Bar. Here the articles are listed in two-column format in descending chronological order (i.e. with the most recent appearing at the top). However, since the number of articles is quite large, this format may not be the most useful for finding information on a particular topic. Say, for example, you are interested in brakes. This is where the Category Index comes in. By pressing on the "Category Index" button on the Nav Bar you are taken to a page that groups the articles by subject or topic. You can either click on the "Quick Link" at the top that lists the topic that interests you, or simply scroll down the page through the topics. Reading the Articles1. Each article is a single, long (sometime very long!) page. This is so that, if you have a slower internet connection, you can open it, give it some time to load, and then navigate it easily. It also facilitates saving of the page to your local hard drive so that you can return to read it off-line at your leisure. 2. The "thumbnail" pictures imbedded in the articles are generally set to a largish 300 pixels wide. While this increases page-loading times, it is done so that they are large enough to show sufficient detail to be useful while reading the article without having to enlarge them. This size also facilitates the saving of the page for later off-line reading. 3. The majority of the pictures are able to be enlarged by clicking on them. The site uses "Lightbox" functionality for this, so that when you click an image, it opens in a pop-up-like box on top of the page you are reading. See the section below on "Lightbox" for more info on using this functionality. 4. Since the articles are long, and therefore reading them will involve a lot of vertical scrolling, the following tips can help you navigate more quickly. Note, these tips are based on the Goolge Chrome browser and may differ slightly in different browsers.
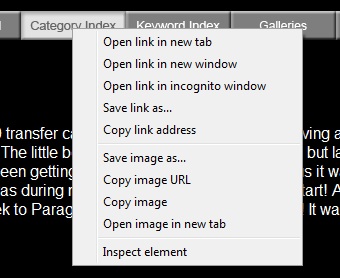
5. Links to .pdf documents and external websites are set to open in a new browser tab when clicked. If you have several documents or different articles opened in different tabs, you can quickly navigate between the tabs by pressing <Ctrl-PageUp> to "scroll" forward in the order of tabs or <Ctrl-PageDown> to "scroll" backward in the order of tabs [ <Cmd-PageUp> and <Cmd-PageDown> on a Mac ]. 6. The Navigation Bar buttons, and other links to "internal" pages (e.g. the links from the index pages to the actual articles) are set to open in the current window, replacing the content you are viewing. This is so that you don't end up with hundreds of tabs open while navigating around the site. If however, you prefer to open one of these links in a new tab (so as not to disturb what you are currently viewing, for example) you can simply right-click on the link and select "open link in new tab" from the pop-up menu, like this:
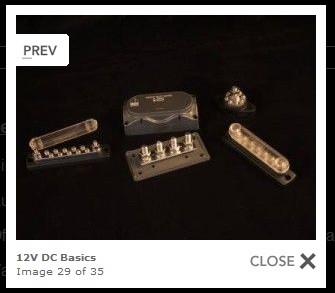
7. You can find specific information in any article (i.e. on any page you have open) by pressing <Ctrl-f> to bring up your browser's "find" functionality. A box will open where you can type in what you are searching for and there will be buttons for "previous" and "next" to help you navigate to what you are looking for. In Chrome the box opens at the top right, in IE it is on the top left. Both highlight all instances of the word or term you enter and both have buttons for previous and next to help you navigate between instances. Using LightboxWhen you click an image to enlarge it, it opens in Lightbox and looks like this:
Note how the background article is dimmed, and the image opens in a bright white Lightbox. To close the image, either:
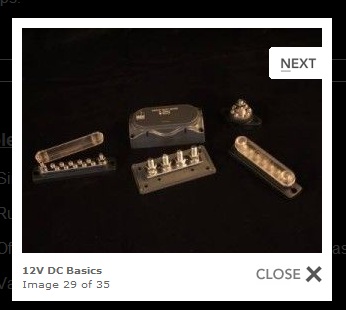
On the lower-left of the Lightbox you can see the name of the article which the image is part of (in this case "12V DC Basics"). Below that you can see the number of the image you are viewing, as well as the total number of images in the article. While the Lightbox is open, you can "scroll" forwards and backwards through all the images in the article without returning to the article by either:
The <Prev> and <Next> buttons look like this:
When enlarging an image, if you prefer to have the image open in a new tab, rather than in Lightbox, you can simply right-click on the image and select "open link in new tab" from the pop-up menu, like this:
Note that while an image is open in Lightbox, you can still scroll up and down through the article using your browser's vertical scroll bar, your arrow keys, or the scroll-wheel on your mouse; and since the background article is only dimmed it is still possible to read the text. The Search FunctionAt the top of each page there is a custom site-specific Google search function. It operates like any search function where you type in what you're looking for and hit <Search>. It searches only pages resident at BillaVista.com and the results are displayed in a familiar way. It is the most thorough way to search for a word, topic, or phrase, but as such also returns the greatest number of results, some of which may not be useful to you. When searching for information, my recommendation would be to:
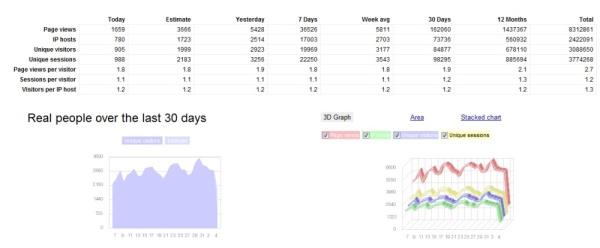
The Hit CountersAt the bottom of each page there are two hit counters. On the left is the count of page views of BillaVista articles that have been viewed regardless of where on the Internet they have been published. The second is the count of page views of BillaVista articles that have been viewed at BillaVista.com. In either case, clicking on the number will open a page that gives more specific details and stats, such as unique visitors, page popularity, countries visitors come from, etc. This data is presented in tabular and graph form, an example of which looks like this:
|
|


