|
Installing Rotopax Gas Cans on a Can-Am G2 Outlander By Bill "BillaVista" Ansell |
IntroductionThe ability to carry extra gas can greatly extend your range and is great for peace-of-mind on those day-long rides. My preference is to use Rotopax fuel cans as they are, in my opinion, the best quality and I have been using them for several years and have never had one leak. Here's a look at how I mounted two 2-gallon Rotopax cans to the front of my 2014 Can-Am Outlander 1000XT. |
 |
|
|
 |
In order to mount the cans, the first thing you need to do is set them on the front rack where you want and make some chalk or pencil marks on the rack. Make sure that where you position them doesn't leave them hanging out where they'd be susceptible to trail damage. I'm using the Rotopax universal mounting plate, pictured at left. InstallationNext you need to remove the front rack so you can get everything positioned and drill the mounting holes through the rack and Rotopax mounting plate together, starting from the underside of the rack. |
||||||||||||||||
 |
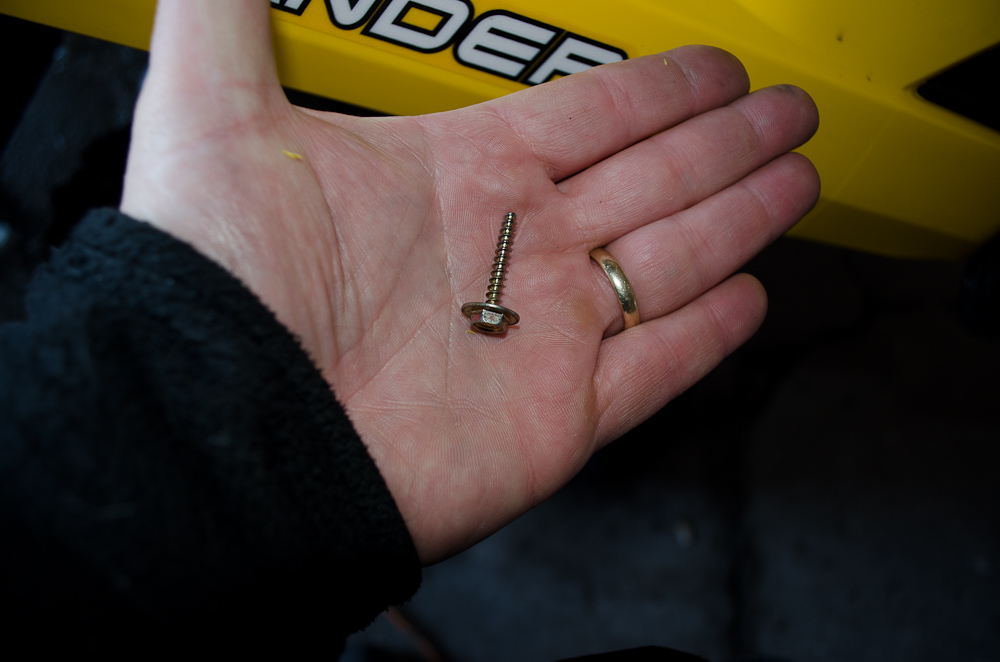
You will need to remove 8 bolts / screws in order to remove the front rack. Only six need to be re-installed as the two smallest screws (top row, extreme left and right in the pic) are simply "assembly-line" fasteners used at the factory to hold parts together while the ATV is being assembled, but serving no useful purpose after the machine is built. |
||||||||||||||||
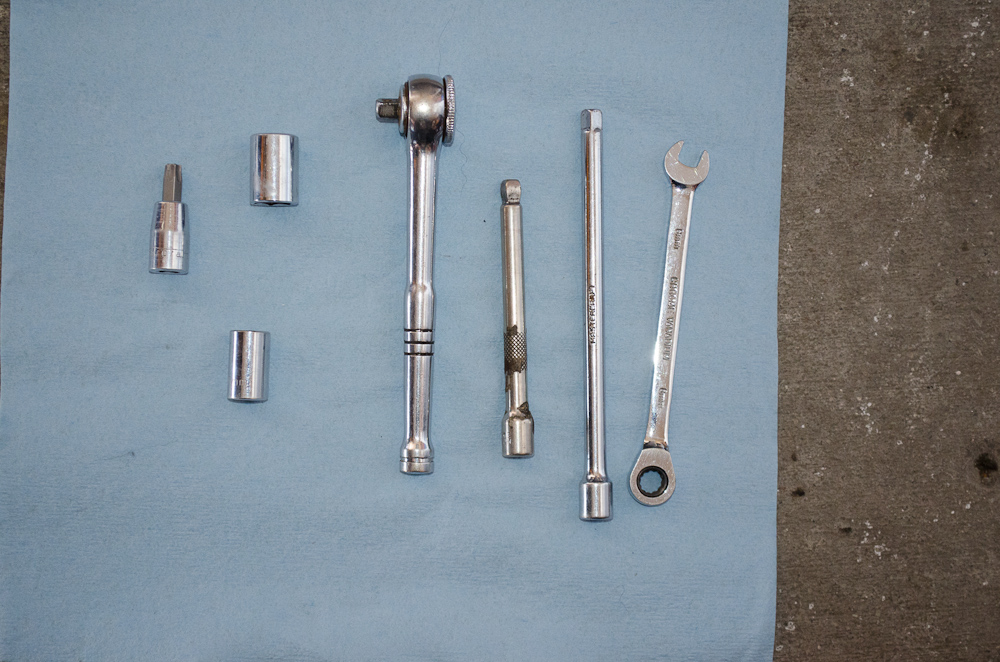 |
I used the following tools to remove the front rack:
|
||||||||||||||||
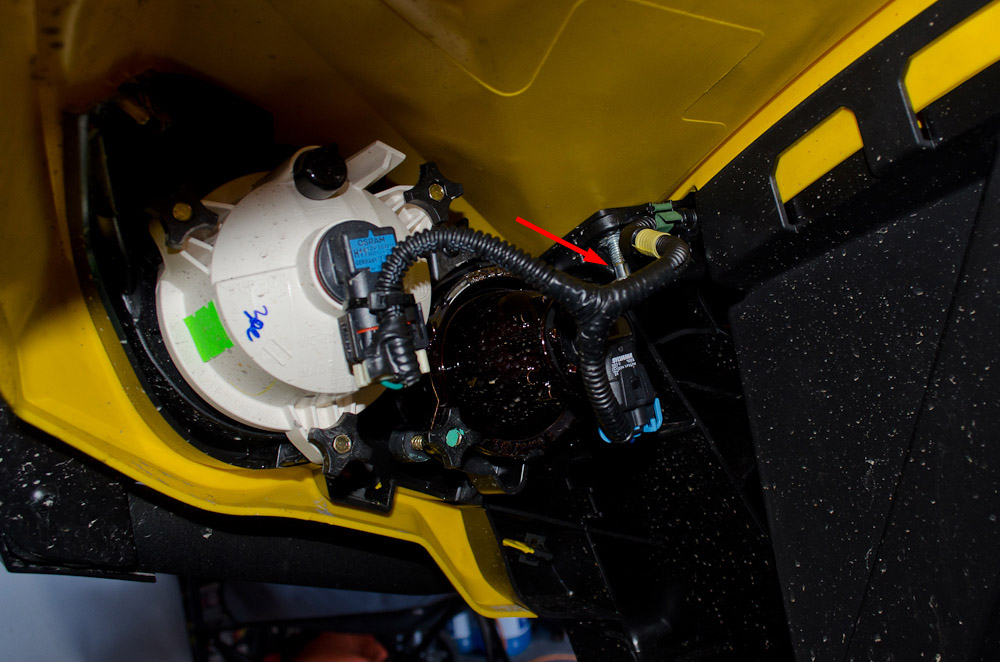 |
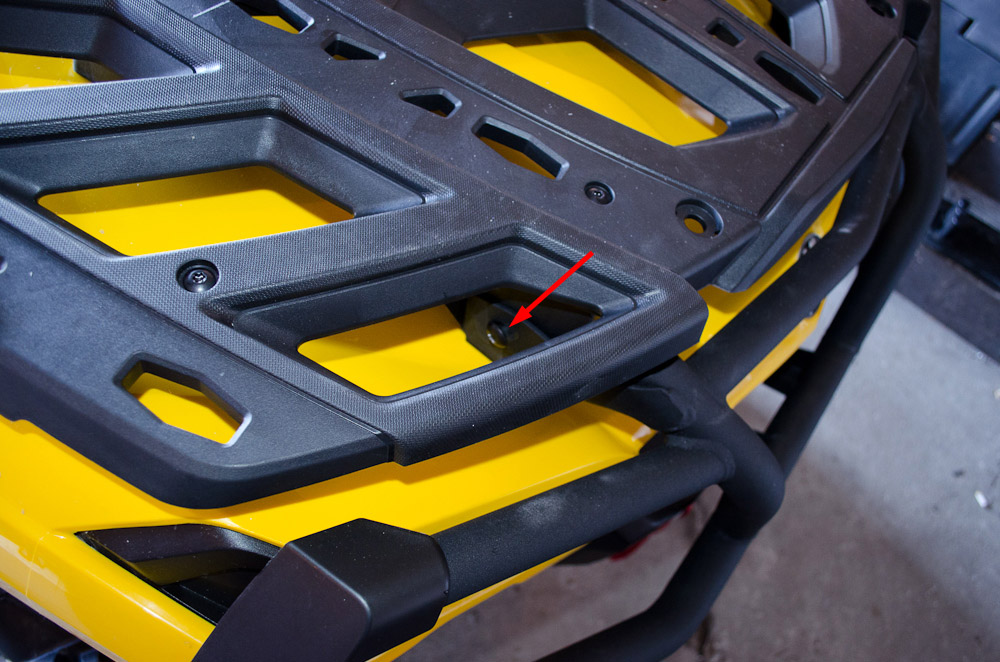
Start by removing the silver-bolts in the first picture, which are located up under the front end, beside the lights. There is one on each side. They have 13mm heads. The red arrow shows this bolt being removed on the left side. |
||||||||||||||||
 |
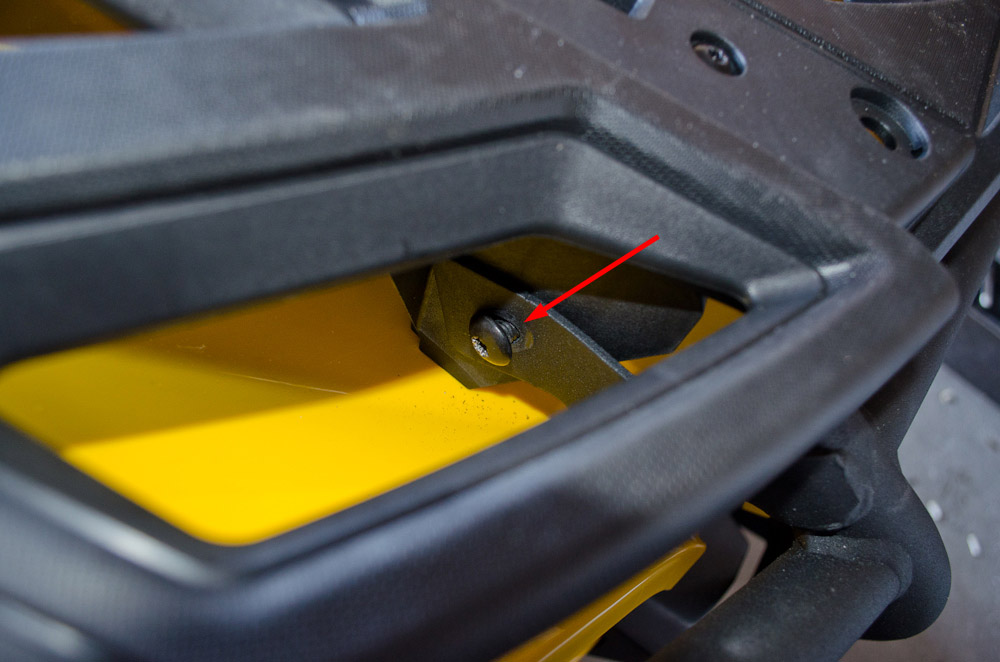
The red arrow indicates the location where the silver bolt was removed from the right side. |
||||||||||||||||
 |
Silver bolt removed. | ||||||||||||||||
 |
Next remove the two black bolts which are located on the front end of the ATV and join the rack to the front bumper. They have T-30 Torx heads. |
||||||||||||||||
 |
Close up of the right-side Torx bolt holding the rack and bumper together. | ||||||||||||||||
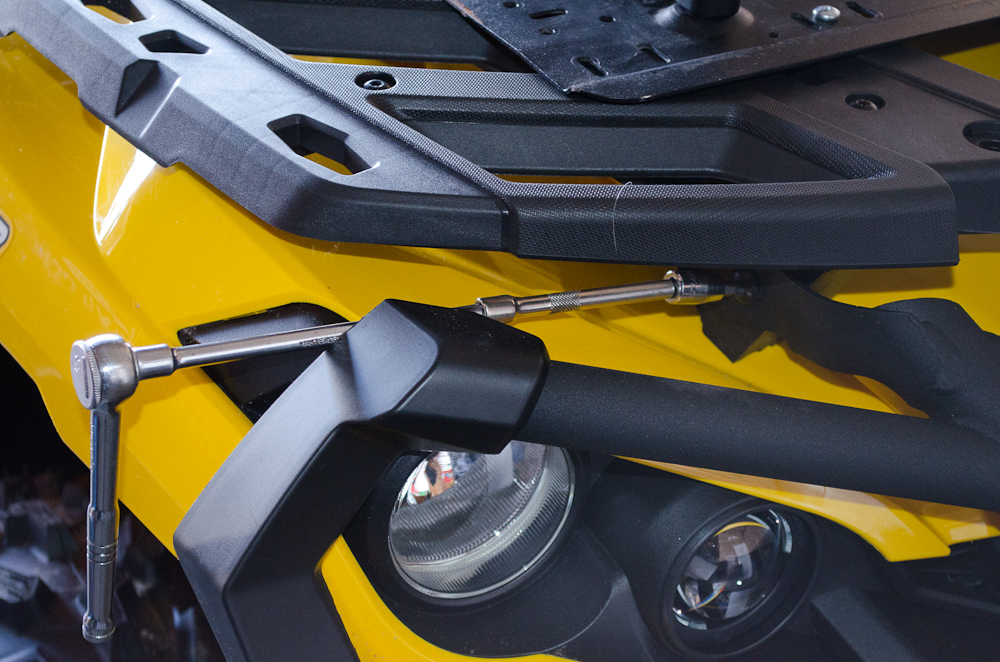 |
I used a 1/4" ratchet with a 6" extension and a 4" "wobble" extension to get to the bolts. | ||||||||||||||||
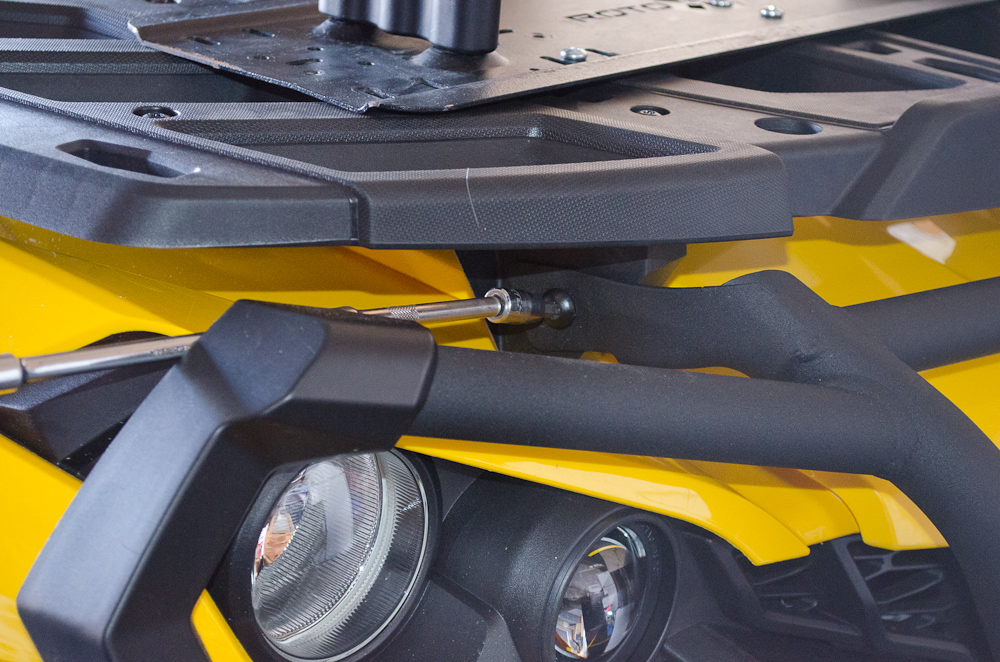 |
The "wobble" extension allows a little misalignment between itself and the Torx bit, which allows you to get better alignment between the bit and the screw head. | ||||||||||||||||
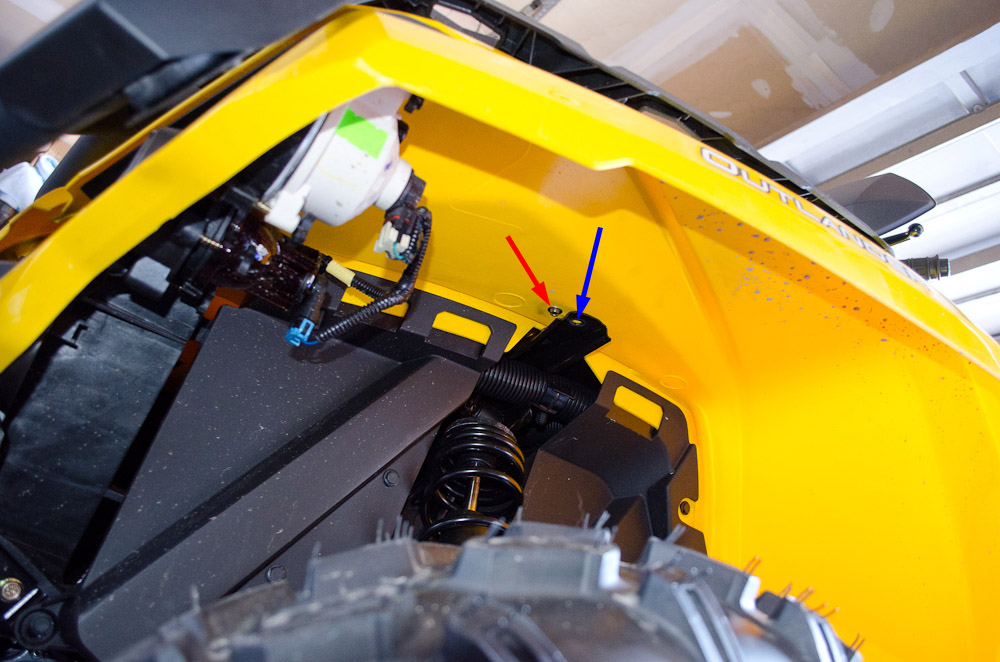 |
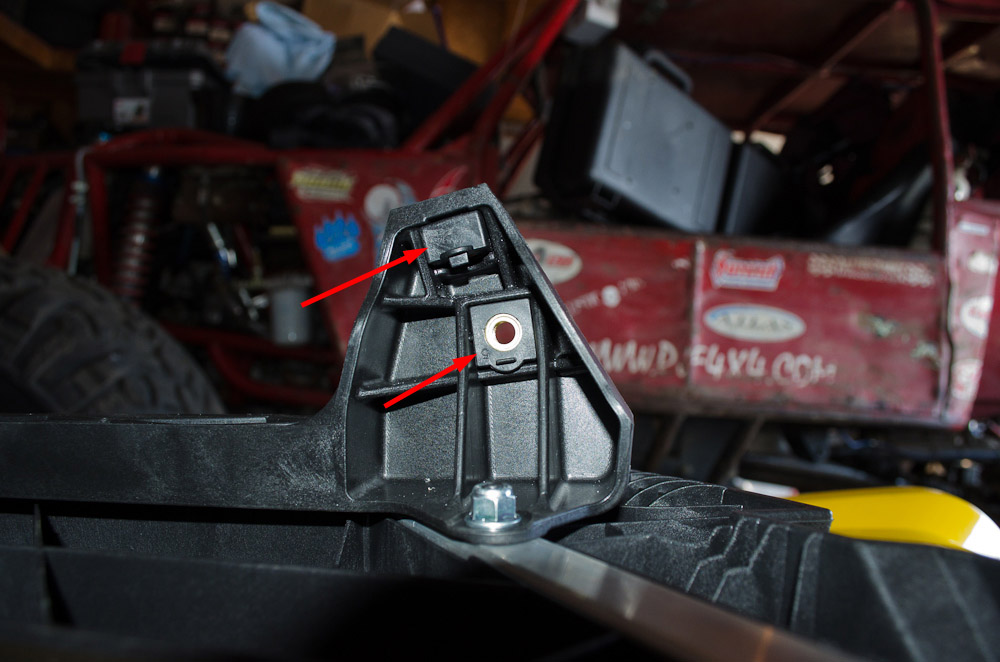
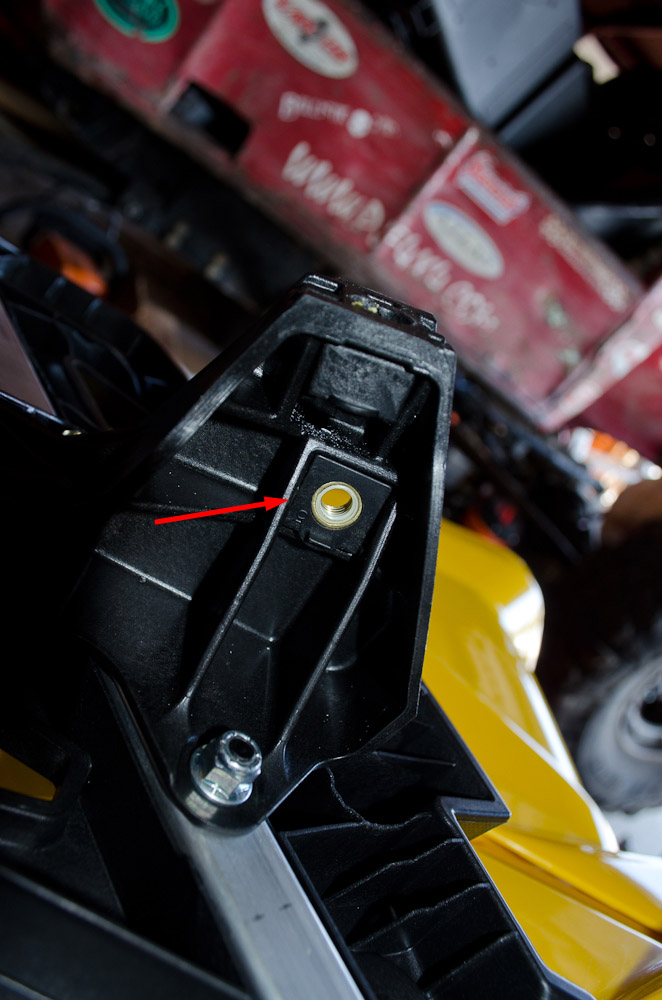
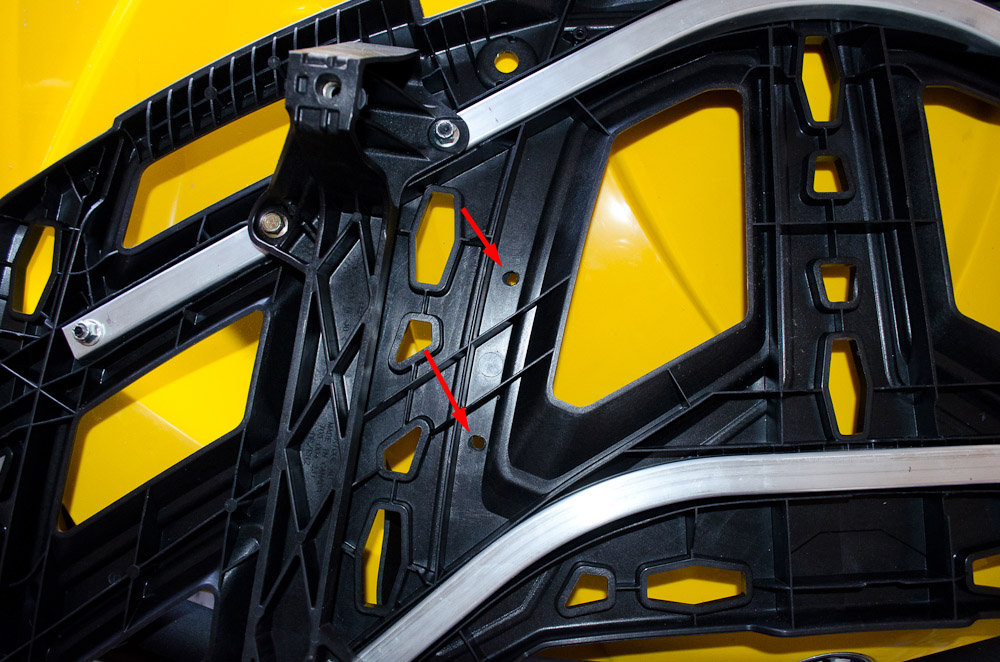
There last two bolts on each side are located up under the front fenders. One is the long bolt from the top picture, it has a 10mm head, and goes through the frame and fender into the rack (blue arrow). One is the previously mentioned "assembly-line screw", it has an 8mm head, and goes through the plastic and into the rack (red arrow). |
||||||||||||||||
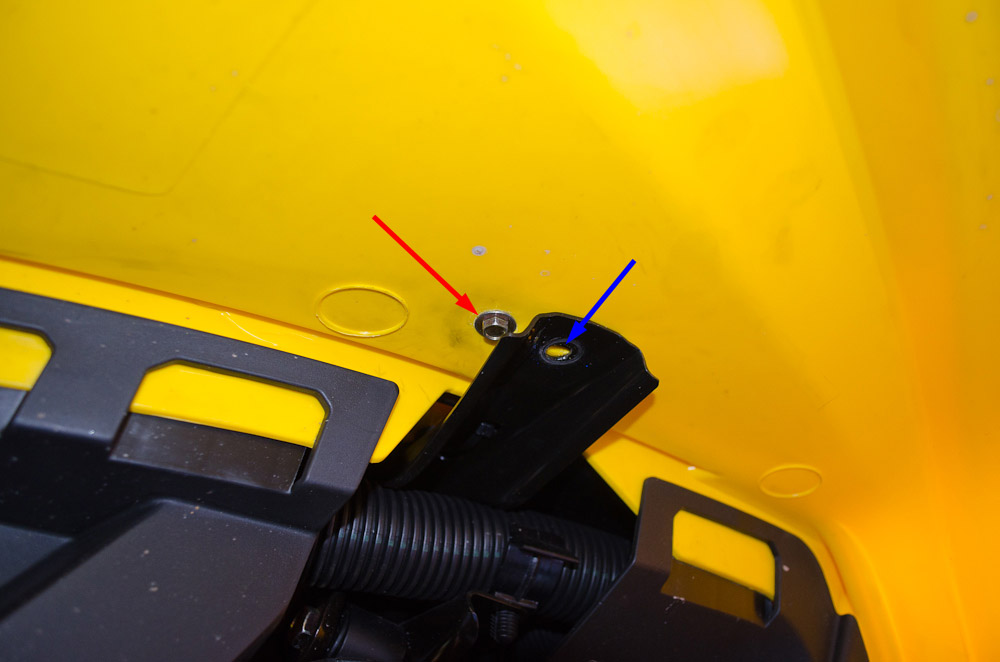 |
Close-up of the two fastener locations under the front fender. Remove the 10mm bolts first. Then use a small 8mm open-ended wrench to get to the smaller assembly-line screw (red arrow) There is insufficient room to completely remove it before it hits the bracket. |
||||||||||||||||
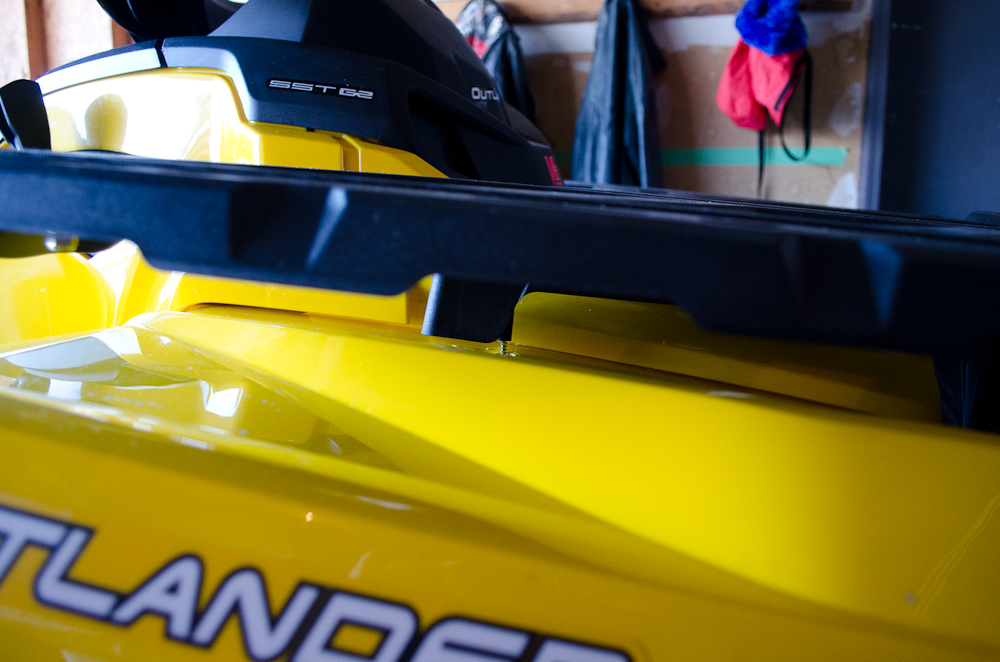 |
As such, as you loosen it, you have pull up on the rack a bit to give yourself room to remove the screw. | ||||||||||||||||
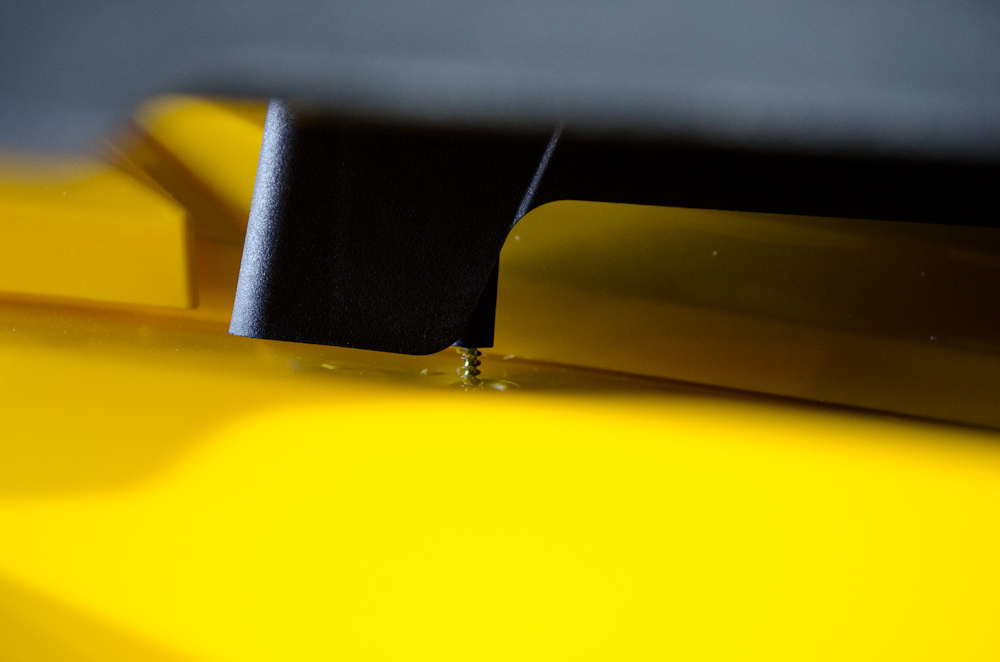 |
Assembly-line screw being removed as rack is pulled up. | ||||||||||||||||
 |
Assembly-line screw removed. | ||||||||||||||||
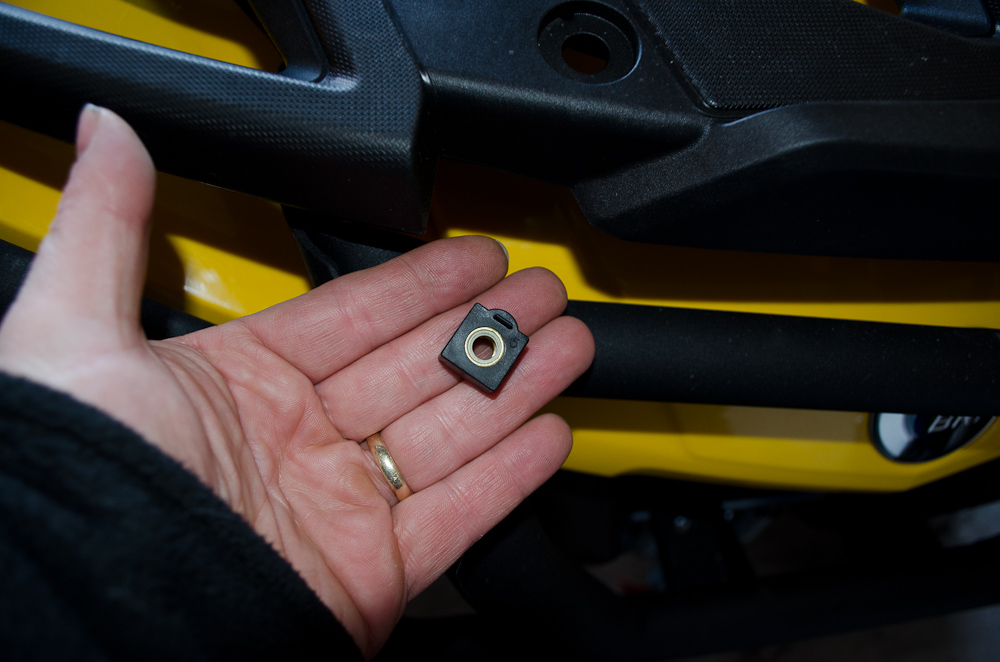 |
All six of the bolts you will re-install screw into nuts held captive in little plastic squares, like this. The plastic squares fit into cut-outs on the underside of the rack. Be careful not to knock them loose and lose them as you remove the rack. |
||||||||||||||||
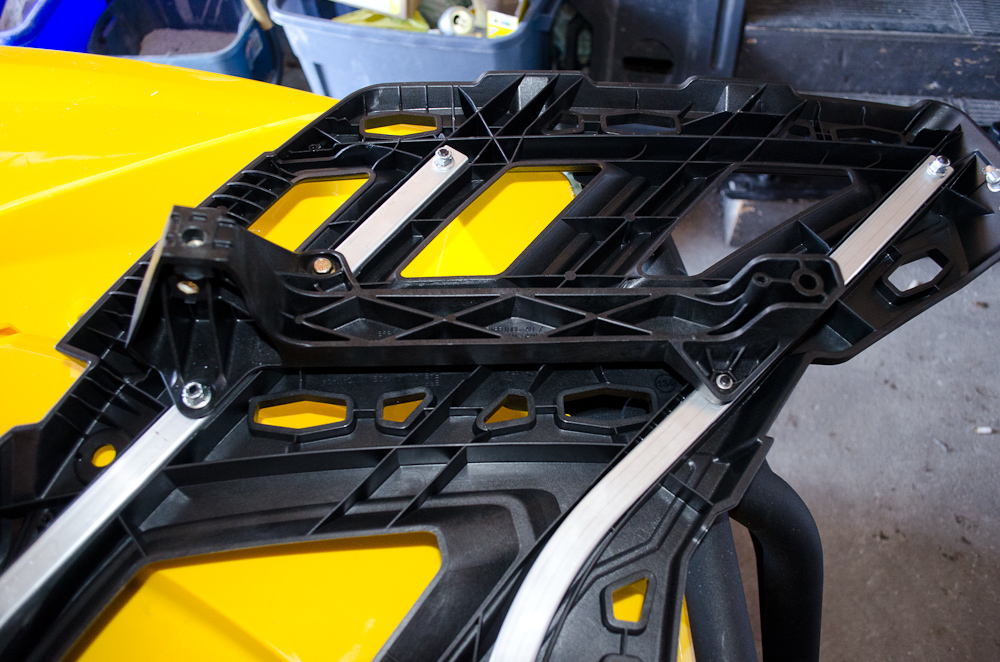
 |
With all the bolts removed, you can simply pull the rack up and way from the ATV. Here I have removed it and flipped it over so you can see the underside. |
||||||||||||||||
 |
The red arrows show the location of the plastic captive nuts that the silver and black bolts screw into. | ||||||||||||||||
 |
If you happen to knock one loose (as obviously I have done here) , you can just fit it back into its position. | ||||||||||||||||
 |
Captive nut back in position. | ||||||||||||||||
 |
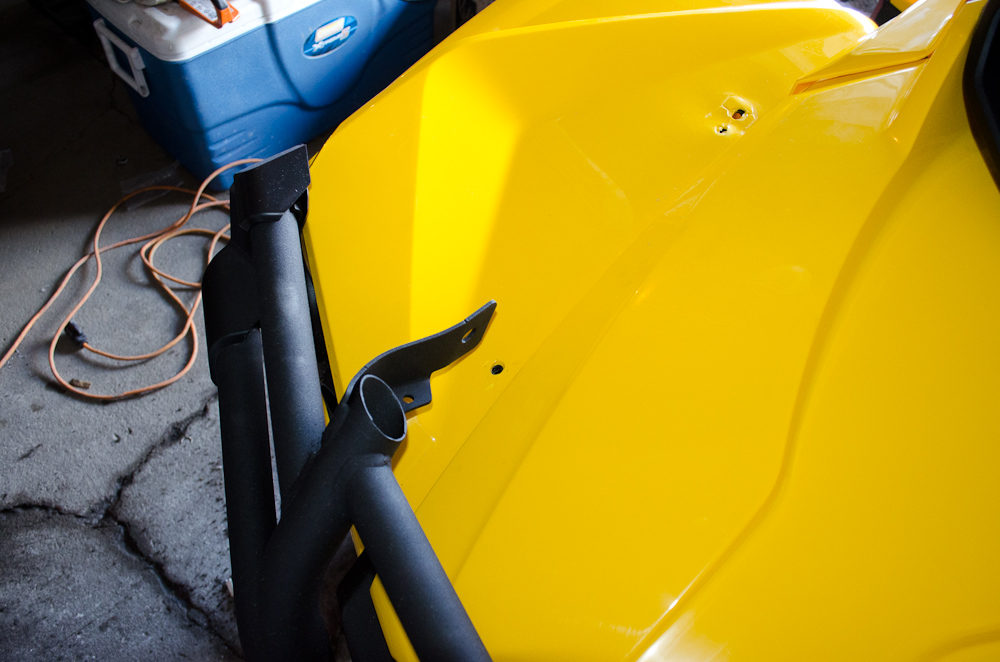
Here's what the front end looks like with the front rack removed. | ||||||||||||||||
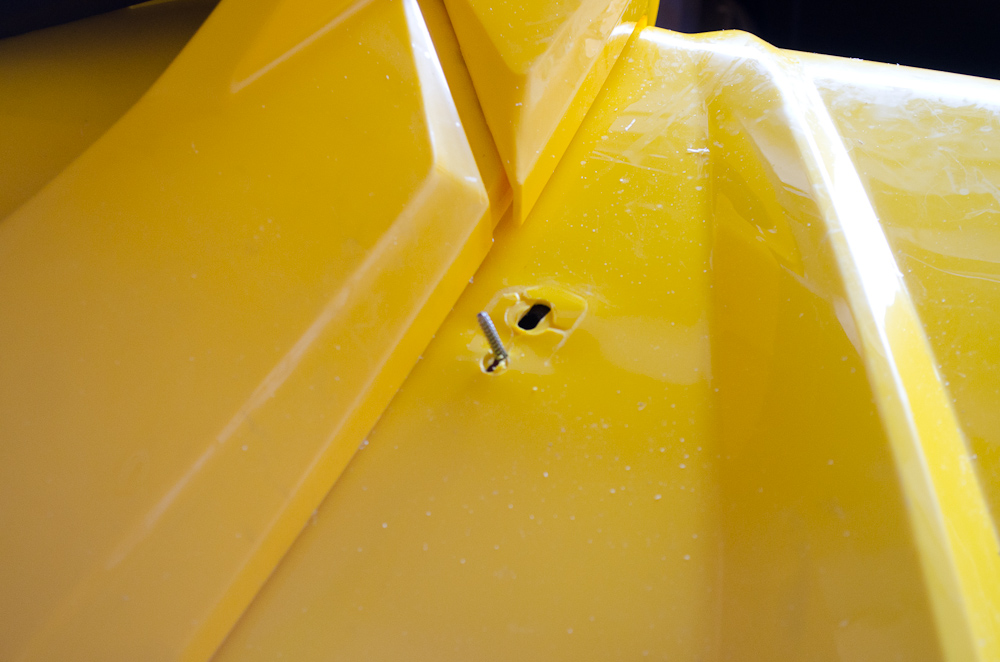 |
The smaller hole here is the one the "assembly-line" screw came out of. You can see that it serves no useful purpose in this location after the machine was built, and was clearly used to hold the rack to the fender as the front end was being built, before the rack-and-fender assembly was bolted to the frame (that's my deduction anyway). | ||||||||||||||||
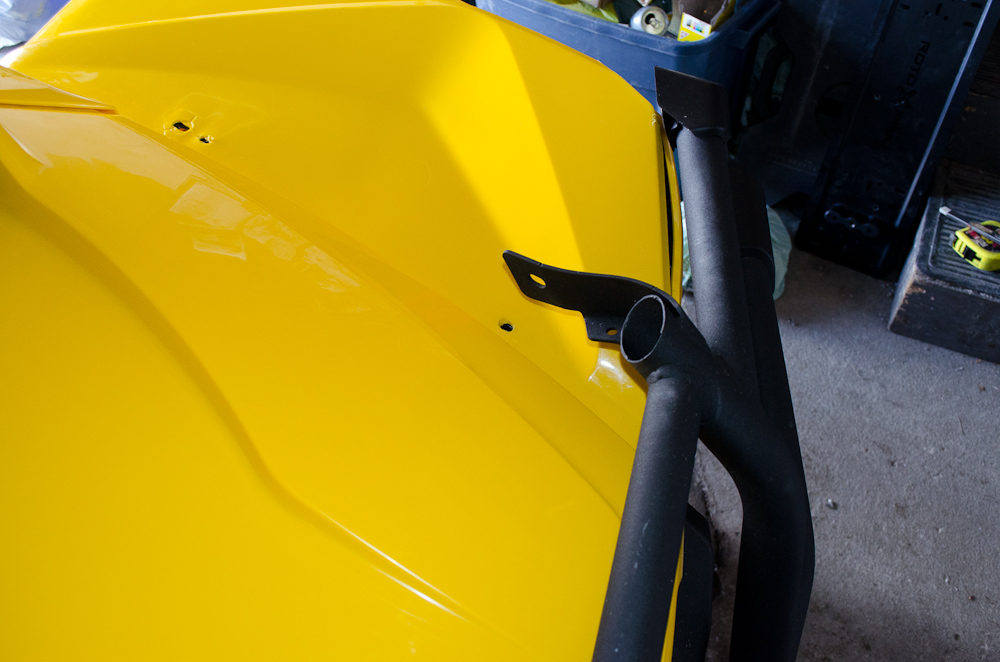 |
While I had the rack of, I took some pics of the space left between the bumper and the body when the rack is removed. Left side. |
||||||||||||||||
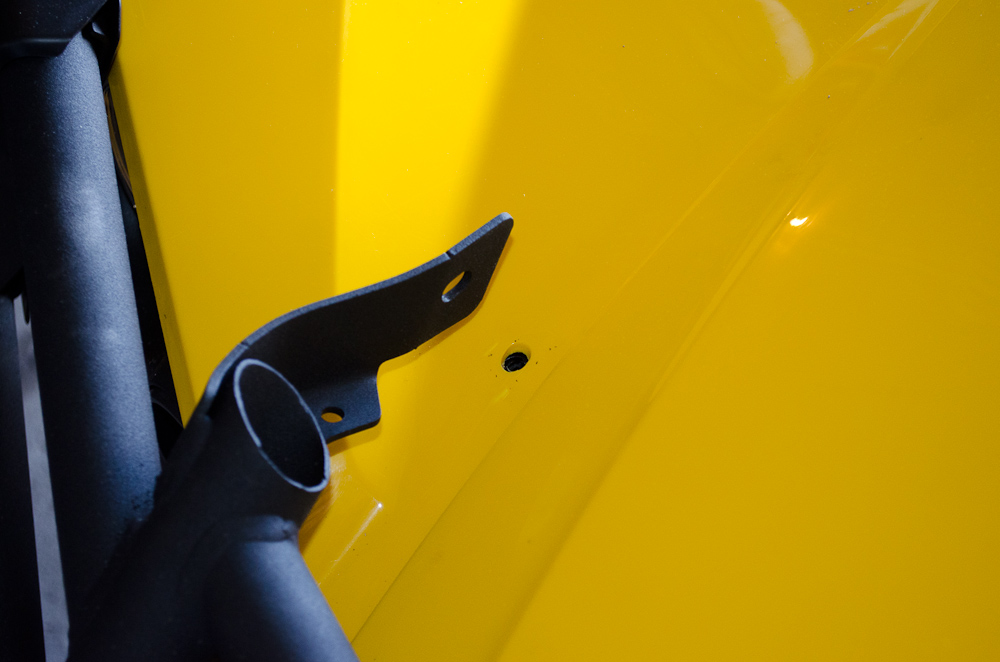
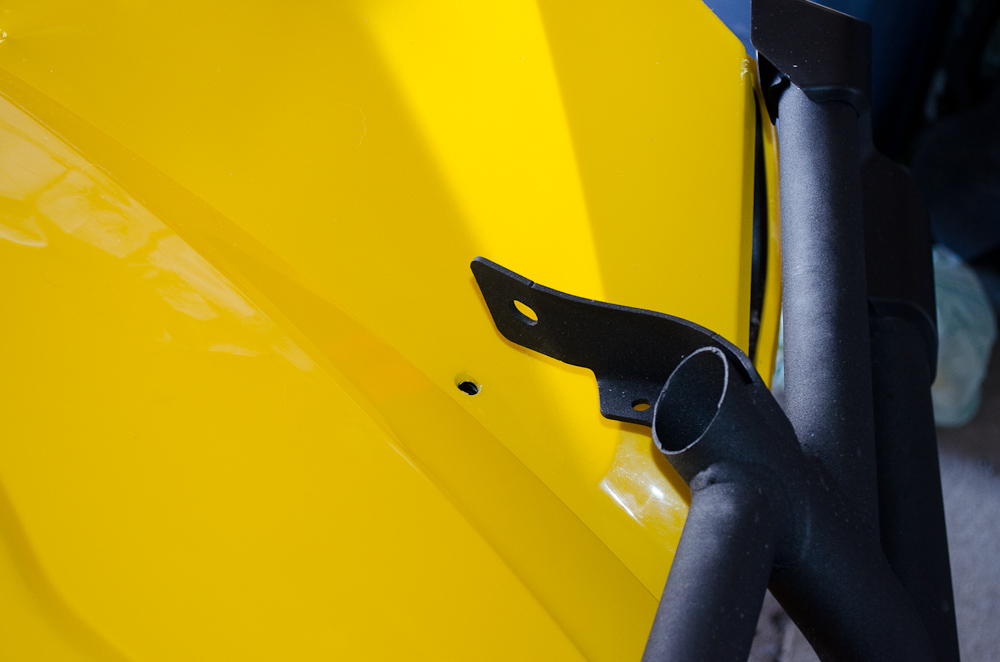 |
Left side close-up. | ||||||||||||||||
 |
This space would have to filled with some kind of fabricated L-shaped bracket if one wanted to run with the front rack removed and the bumper retained. Right side. |
||||||||||||||||
 |
Right side close-up. | ||||||||||||||||
 |
Shot of the square aluminum tubing that forms the structural support for the front rack. | ||||||||||||||||
 |
The left-side bracket that mounts the rack to the frame/body. | ||||||||||||||||
 |
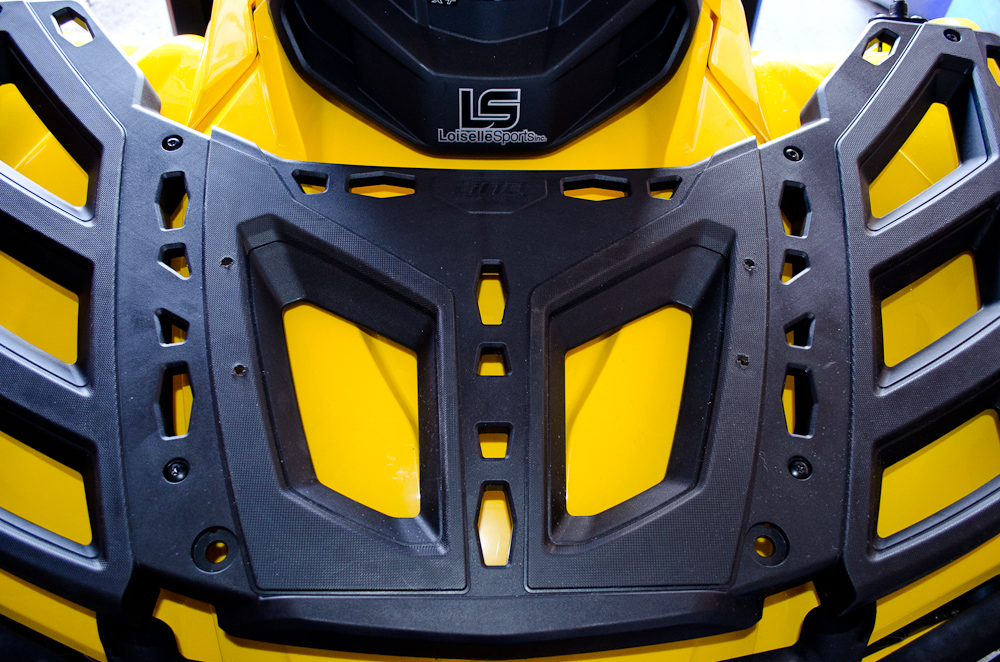
Because of the shape of the plastic on the underside of the rack, you don't have unlimited options on where to drill the holes for the bolts that will secure the Rotopax mounting plate to the rack. After lining things up, I chose the 4 locations shown by the red arrows. |
||||||||||||||||
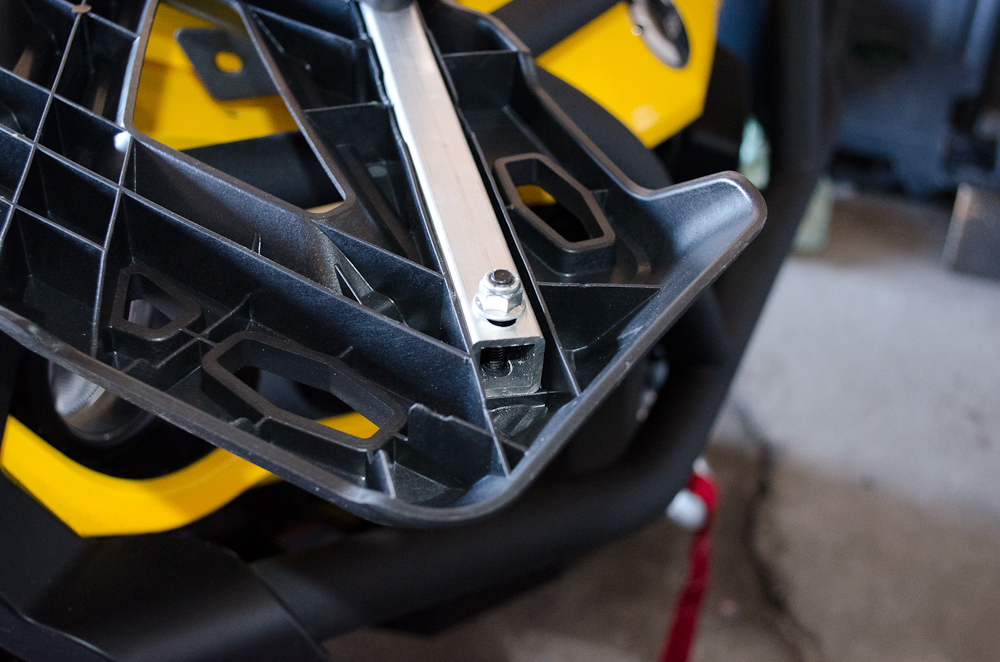
 |
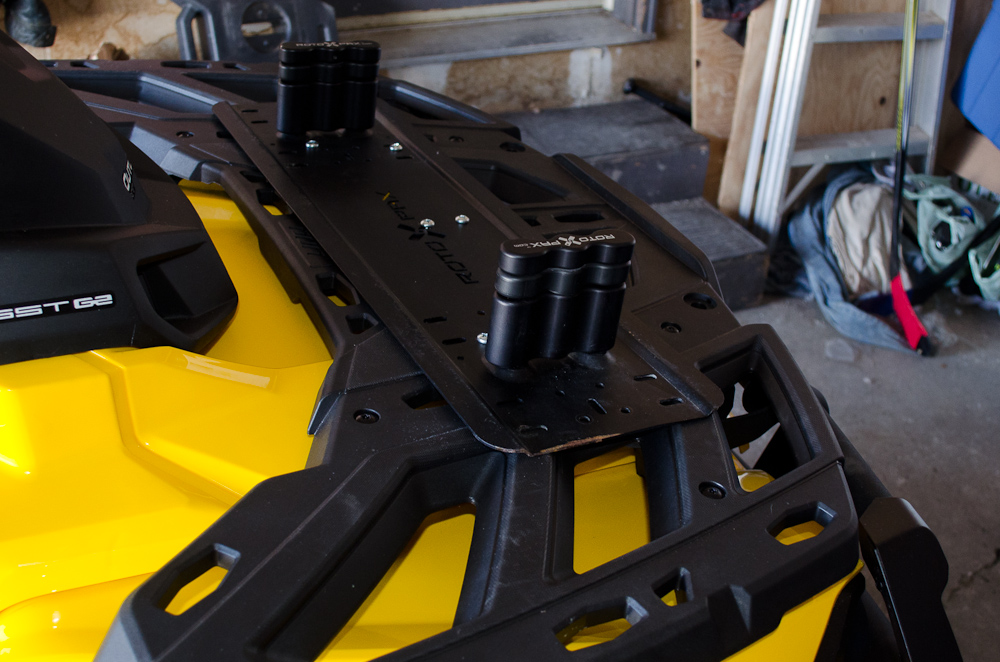
I clamped the Rotopax mounting plate on the rack, flipped the rack upside-down, and then drilled through the rack and mounting plate together. Close-up of the two right-hand side holes. |
||||||||||||||||
 |
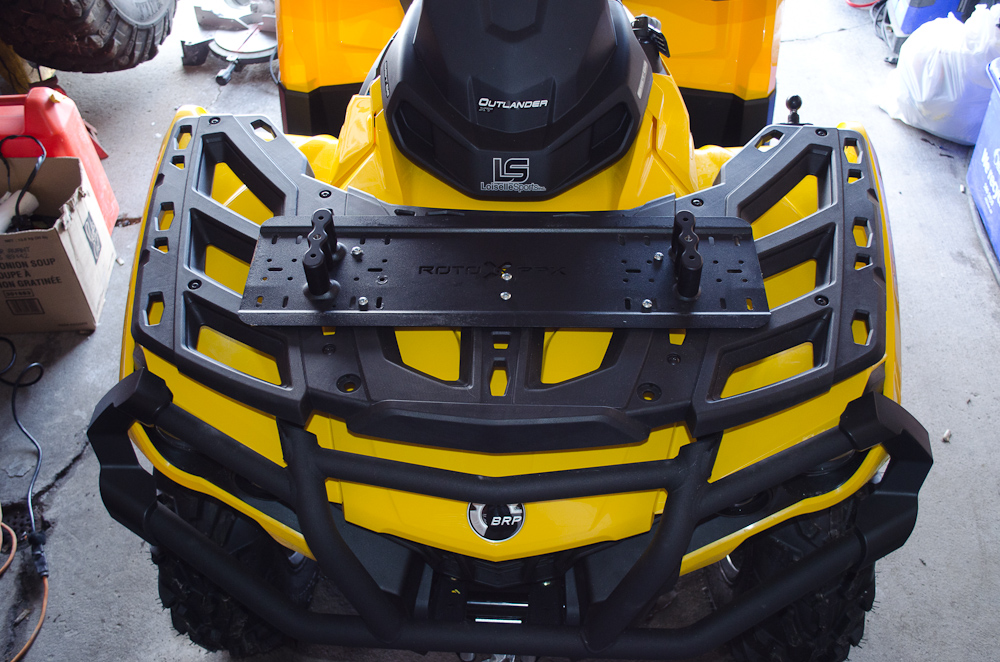
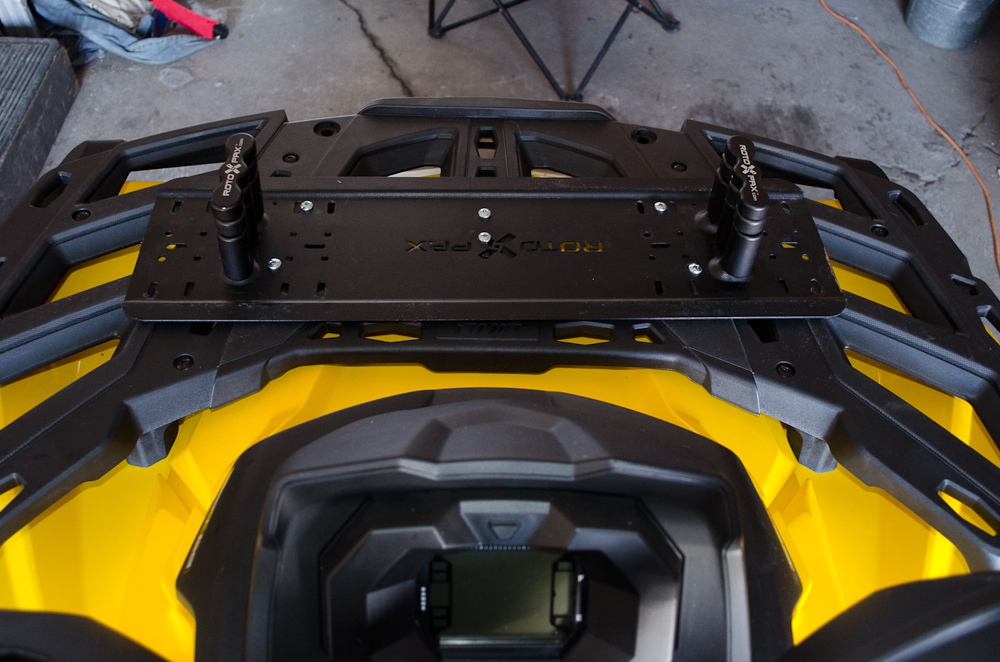
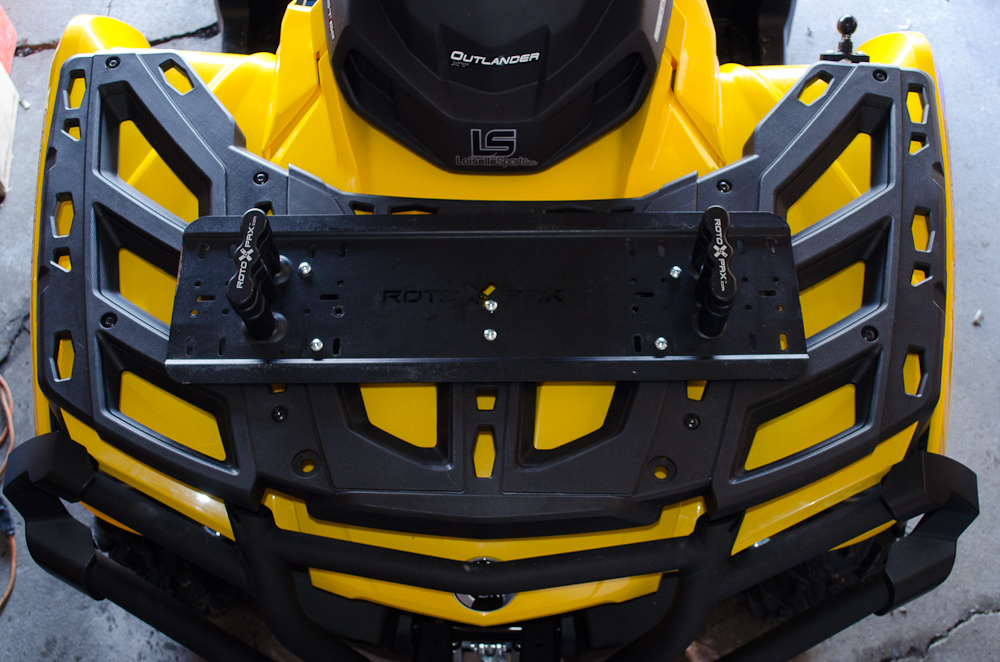
Here's where the 4 mounting holes I drilled are located from a top view. | ||||||||||||||||
 |
If I ever decide to permanently remove the Rotopax mounting plate, the 4 holes I drilled are barely noticeable. | ||||||||||||||||
 |
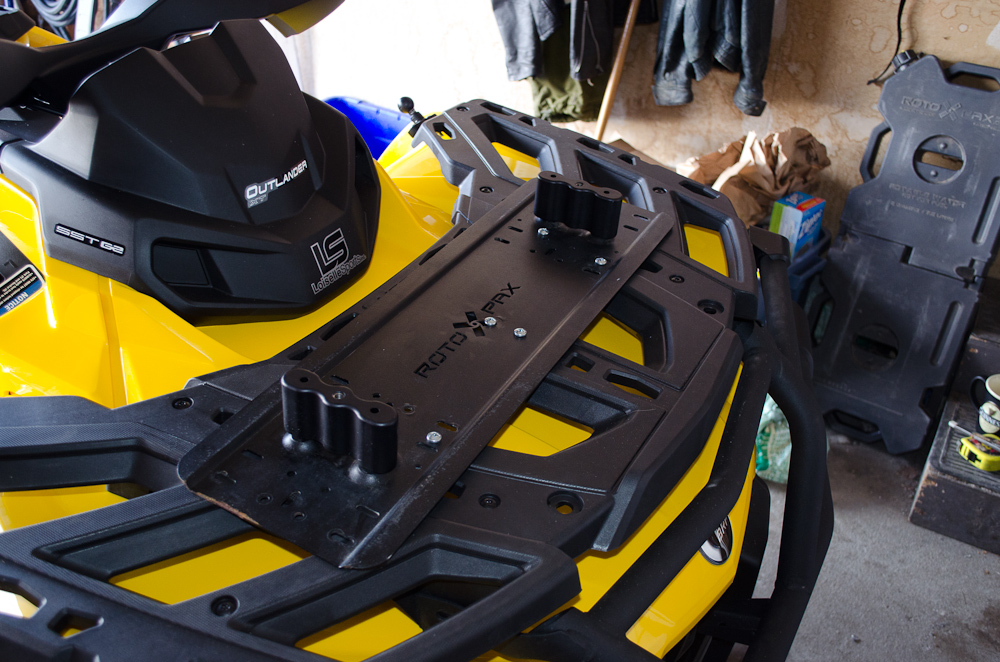
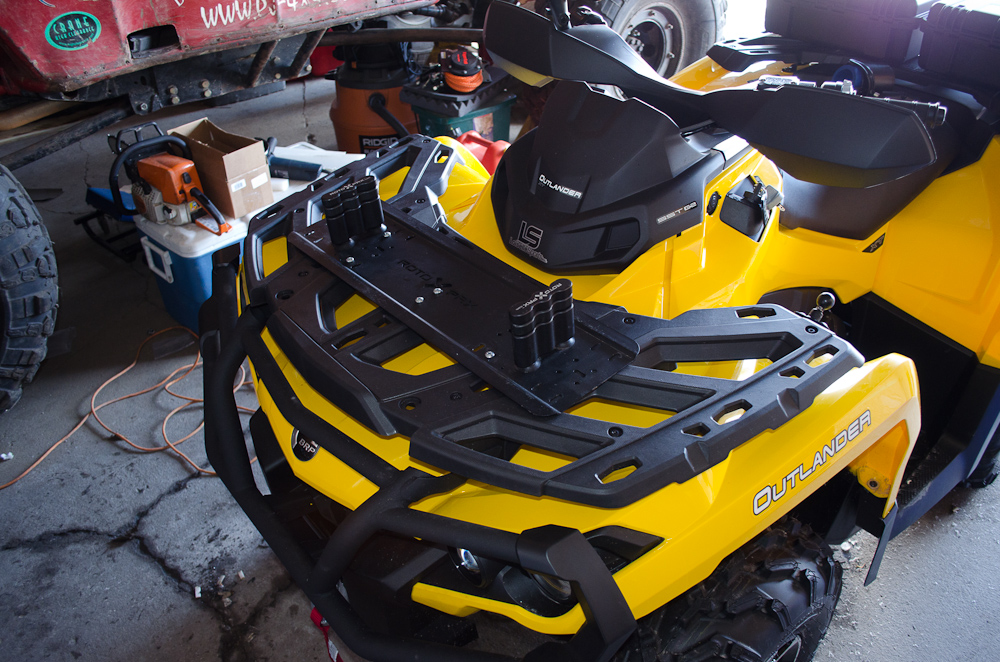
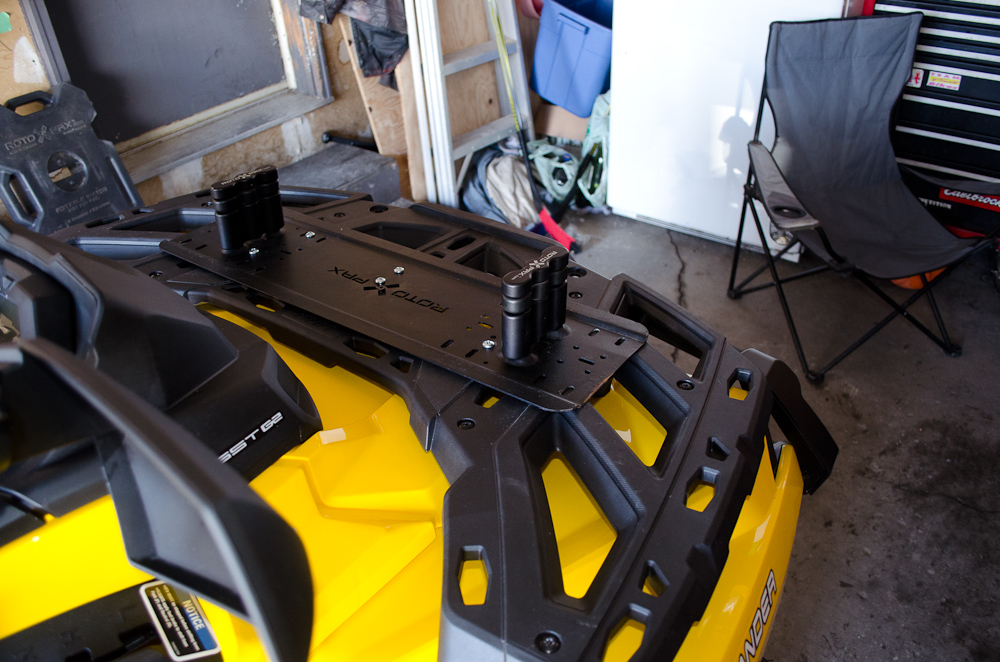
After drilling the holes, removing the clamps, and cleaning off any debris from the drilling, I placed the Rotopax mount back on the rack, inserted the 1/4" bolts, added a tab of blue thread locker to each bolt, and installed the nuts. I also used two bolts and two big washers through the factory holes in the rack (middle arrow). |
||||||||||||||||
 |
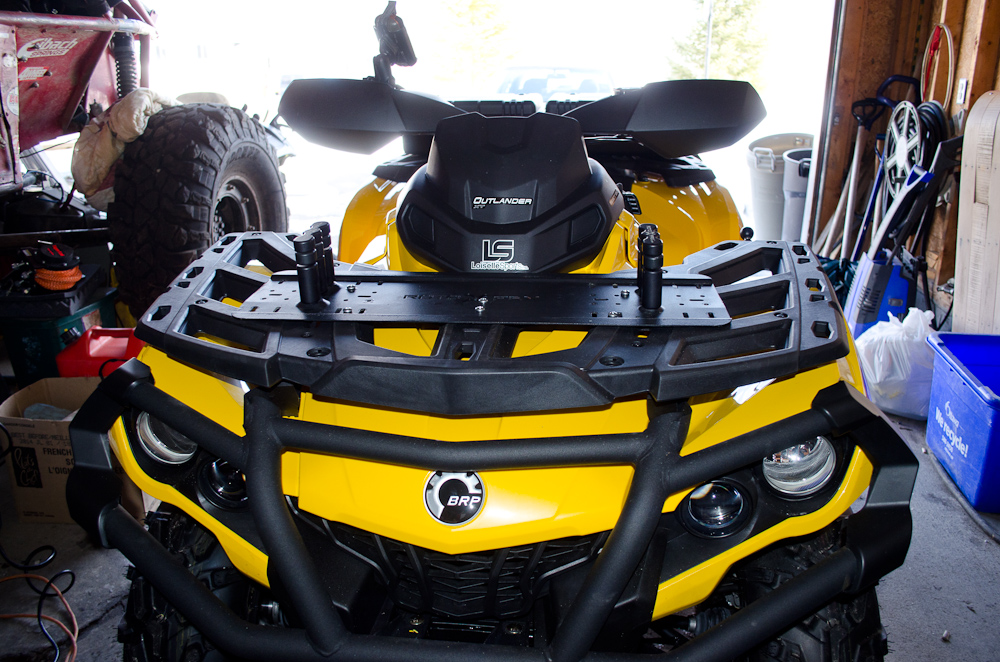
With the Rotopax mounting plate bolted to the front rack, all that is left is to re-install the front rack. This is simply the reverse of removal, except I installed the black bolts between the rack and bumper last, as the bumper needs to be "sprung" away from the rack a bit in order to get the bolts in. As noted previously, I left out the two small "assembly-line" screws. |
||||||||||||||||
 |
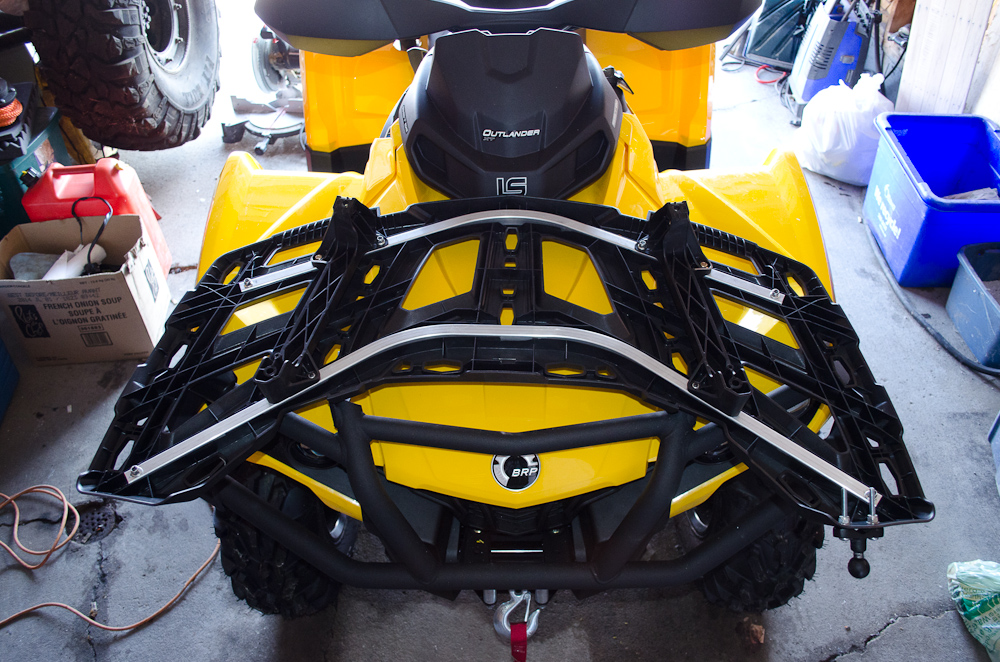
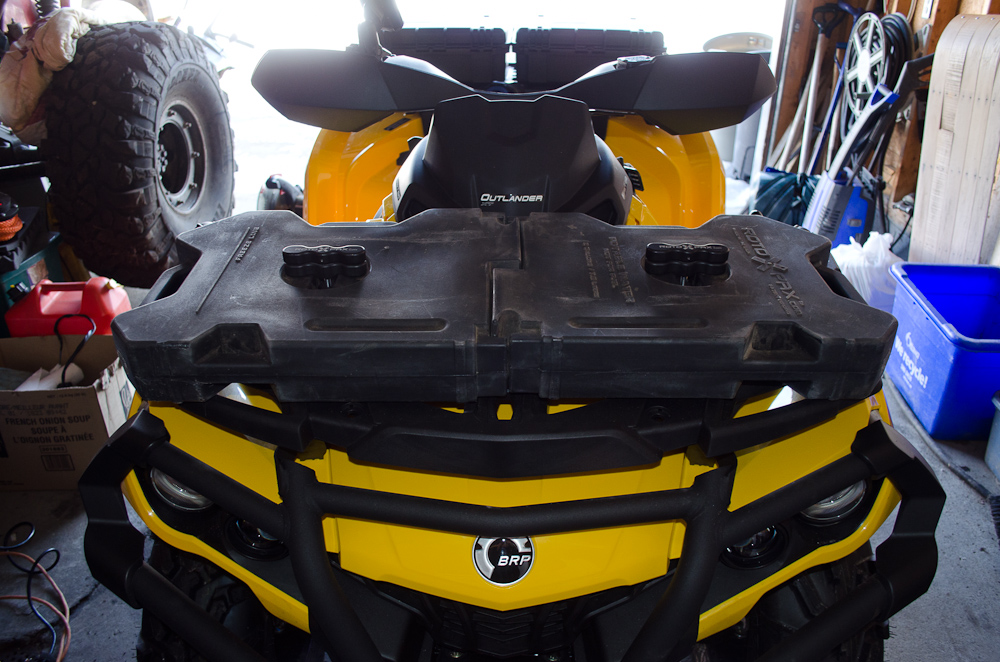
If I need the front rack, I can remove the fuel cans and the top part of the Rotopax mounting handles, and what is left is pretty unobtrusive, leaving me room to mount other things like my chainsaw. | ||||||||||||||||
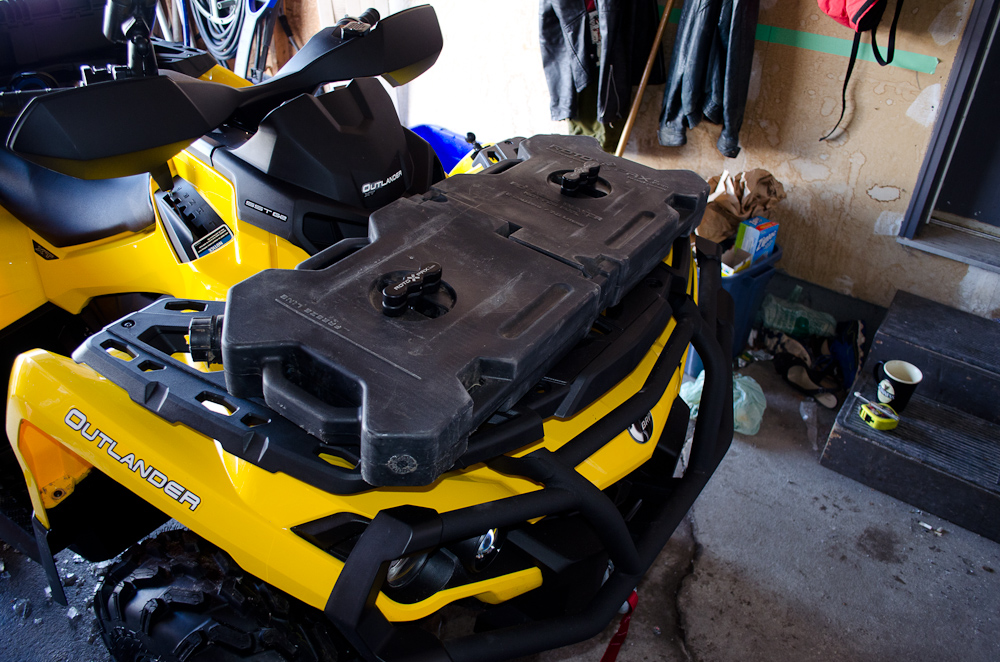
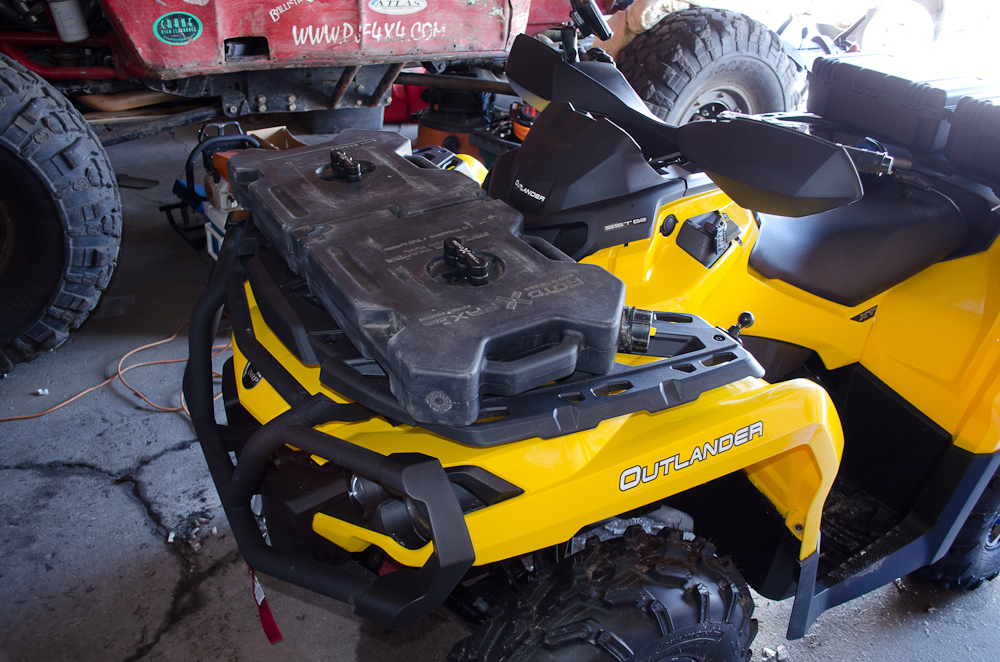
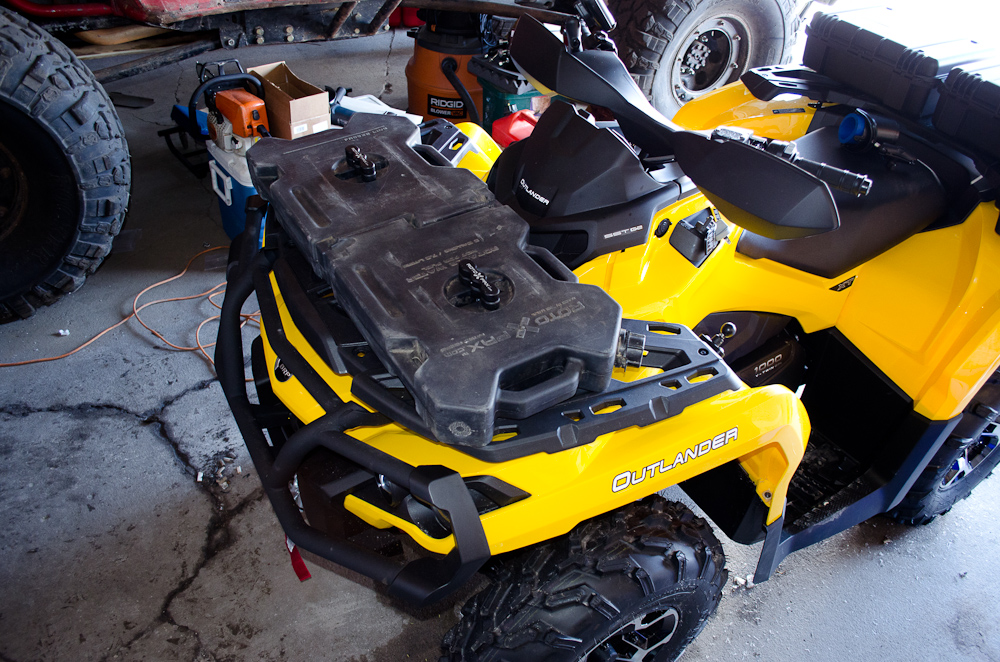
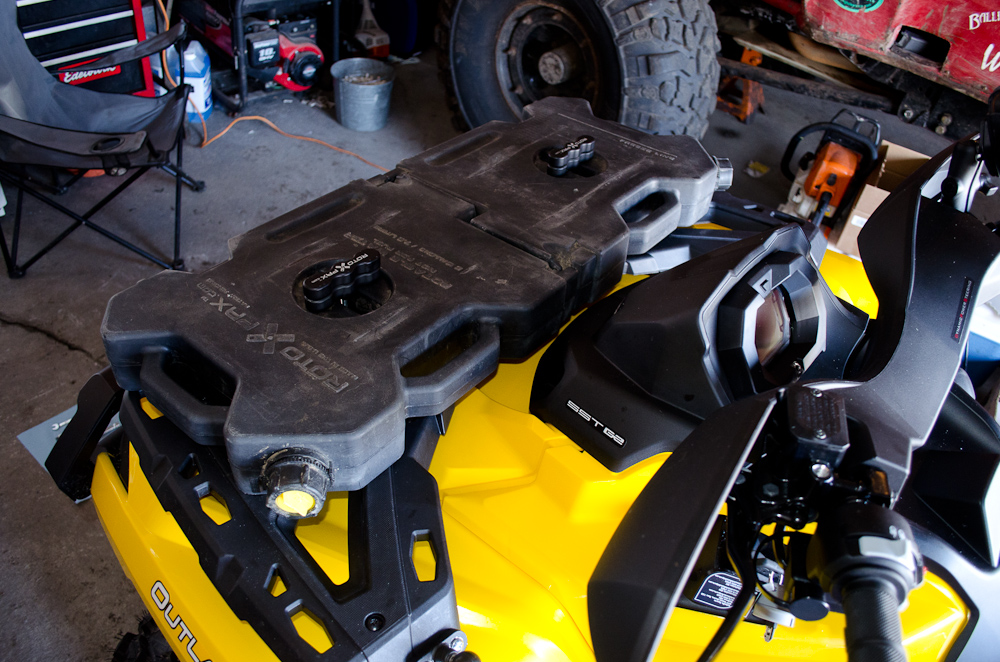
 |
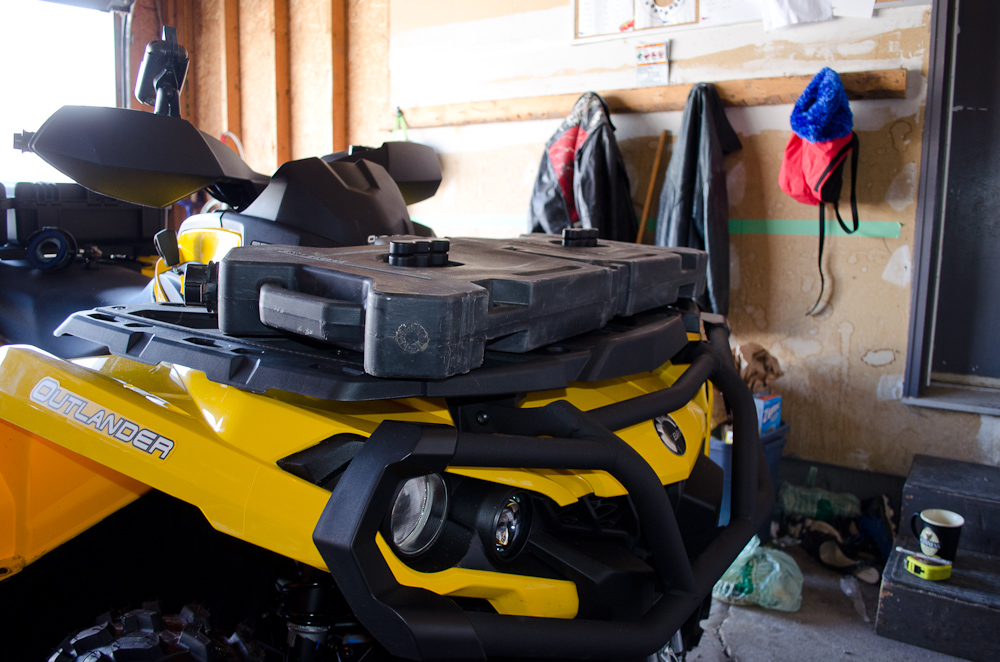
Rotopax fuel cans installed. | ||||||||||||||||
GalleryGallery of the finished job, first with the fuel cans removed, and then with them installed.
|
|||||||||||||||||


|